Showing posts with label craft. Show all posts

Tuesday, February 15, 2011

Make Your Own Easy Bake Oven Mixes Tutorial

My niece loves her easy bake oven, but she uses up the mixes like lightening.  The refills are pricey.  Usually you get 1 yellow cake and 1 chocolate cake plus 2 frosting mixes for about $6.00. 

There is a really easy way to make the cakes without costing a fortune.  It's very simple.  The mixes are basically 2 tablespoons of cake mix, any cake mix.  For birthdays and stocking stuffers, I packaged up a bunch of the mixes in plastic ramekins (available a Gordon's Food Service). Then, I slipped them into a tulle bag.  To make the tulle bags, you just use the tulle by the spool (it's like a $1 for 100 yards or something like that).  You fold it in 1/2 and make an overcast zigzag (see tutorial on this blog) to fasten the sides.  You could also straight stitch the sides and then turn the bag RIGHT sides out. 


Then I add a little custom label with the directions on it.  You can see those above.  Oil makes a cookie and milk makes a cake. 

The great thing about this is that you can either make your own cake mix (minus the wet ingredients) or you can just use your favorite premade mix (which is what I did here).  If you don't want to get ramekins, you can use sandwich bags and make a fold over label that you staple on.  I did that the first time.  All of the mixes were names after my niece - Belle's Famous Sprinkle Cookie, etc.  If they are just for your own kid to use at home, just buy a jar and keep the mix and a tablespoon in the jar and let them scoop and mix their own mix.    

Wednesday, February 9, 2011

Konbit Sante Receiving Blankets

Lisa and I finally finished up the 30 tote bags and 30 receiving blankets for Sunday's party to benefit Craft Hope Project 11, Konbit Sante. 
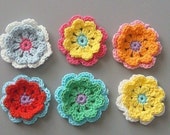
Now I just need to make 30 tiny stuffed animals and we should be all set for Sunday.
By the way, if you missed it, the free tutorial for making receiving blankets in posted on our blog.  They make a really great baby shower gift. 

Tuesday, February 1, 2011

Valentines Wall Hanging

A while back I had ordered a charm pack of Moda Valentine's day fabrics and had intended to make place mats out of it. However, I was in the mood for something new and Valentine's related to add some color to our living room. And this is what I ended up with after just and hour or so.

I took some left over yardage of light blue felt from some Christmas ornaments that I had made and cut into two 24" x 24" squares. Then i made three different sized heart shaped templates out of scrap paper and proceeded to cut the largest and smallest hearts out of assorted pink and red felt. The middle heart is where the charm squares came into play. I actually cut the heart first making the biggest heart that I could out of 9 charm squares (mine where 5" squares). Then I made the template for the small and large square to my desired size.

Next, I simply stitched the charm square heart to the largest felt heart. And then the smallest felt heart on top of those two. Lastly, I stitched down the whole applique on the blue background with a satin stitch. I just eye balled everything as far as spacing went alternating pink and red appliques. 

When I had all of my hearts appliqued down on the back ground, I added three lengths of ribbon (folded in half to make tabs) evenly spaced at the top of the project and pointed inwards toward the bottom of the project.  Next, I placed the backing fabric (the other 24"x24" piece of felt) on top of the appliqued piece (right sides together). I stitched around all sides with a 1/4" seam allowance leaving a 3" opening for turning. Then I just simply turned the wall handing right side out and top stitched making sure to catch the 3" opening.

Voila!


A simple, easy, and inexpensive wall hanging was created. This would be a great way to use up all of your fabric scraps!

Happy Sewing!!

Tuesday, January 4, 2011

5 Fun Tutorials For Using Cupcake Liners


Aunt Peaches shares an awesome tutorial for making this Ruffled Lotus Lantern.

===========================================================


Paper Crave has this great tutorial for a cute cupcake tree. This would make a sweet addition to any Valentines decor:)

=========================================================


The Lovely Paper Blog has a nice tutorial for making these adorable flowers!

===========================================================


The Single Nester has a super easy tutorial for how to make this heart shaped wreath.


Craft Gossip shows us how to make these yummy little treats that use a cupcake liner as the base! 


Sunday, November 14, 2010

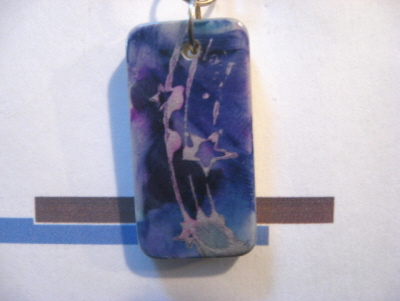
Altered Domino Numerology Pendant Necklace

This is an idea that I had a long time ago after seeing an episode of the Carol Duvall show where the guest altered dominoes. I am not into making a tiny useless mini journal and wearing it around my neck, but I thought that it could be fun to make something that incorporated my love of the occult with an altered domino. I basically took the domino and stamped and inked the front with plain old permanent markers. I used a gold paint pen to "gold leaf" the edges of the domino. I left the back blank so that you could see the numbers on the domino. I did have to use the dremel tool to get the hole for my finding. Plastic dominoes give off the most disgusting gas when you are drilling them so I would not recommend doing it when you are pregnant. I then attached it to a card where I explained how you get your personal number and then information about your number on the back.

altered domino
altered domino

So Simple Monster Softee Dolls For Christmas

I recently made about 30 of these kooky little dolls for my ebay store. I wanted a simple pattern that I could whip up really quickly and that had no hand sewing. I free hand drew a pattern out onto newspaper double. Since I wanted the front to be two colors, I chopped it in 1/2 and used the 2 halves as a template for cutting. Then, I sewed up the 2 front pieces and stiched them onto the back leaving the whole top of the head open. I stuffed the dolls and then top-stiched the head shut with a decorative embroidery stich. The mouths are trim and the eyes are felt that I zig-zagged down.

Twilight Purse / Backpack Charm / Locker Organizer - Great Teen Gift Ideas

This craft was my mom's idea. She saw a woman at the store with a key chain with photos of her grand kids. We decided the make some themed charms chains for the Twilight fans out there.
You need wooden tags which you can buy a package of at Joann's in the section where all of the little wooden pieces are kept. Then you cover the tags with decorative papers. I used ink the distress the edges and the papers for a more romantic feel. Then I printed up the photos and stuck them on with double stick tape. Next, I started on the jewelry part of the project. I took some chain, jump rings, and different charms and hooked everything together. These are pretty long, but you could make them much shorter. I finally fixed the three lengths of chain together with a claw hook so that it would snap onto your key chain, zipper, etc.


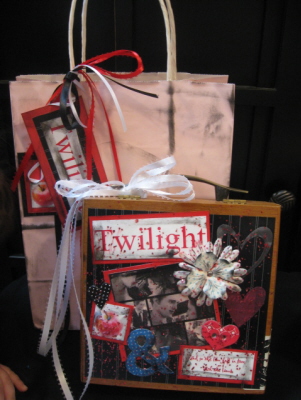
I had a ton of old cigar box purses laying around in the closet just waiting for me to finish them. Once I got hooked on Twilight, I knew that this was going to be the best thing to do with the boxes. I added tons are matted photos, book quotes, hearts, flowers, and lots of dazzling sparkles to the purse. I have actually made several of these up including one totally devoted to Edward.

Twilight Altered Cigar Box Purse

Then, I covered the entire front of the purse in embossing powder and baked it to give it that super shiny "dazzling" finish and infuse it with glitter. Since, I was giving it as a gift, I also made up a matching gift bag.

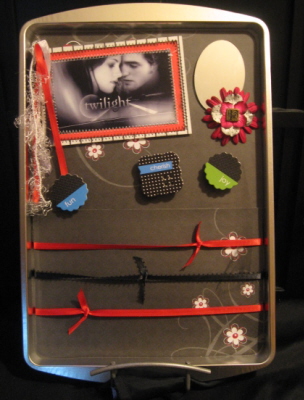
So, I saw someone making altered magnets and I thought that it was one of the dumbest things ever until I realized that they were making them for school lockers. So, I decided to try my hat at making a locker organizer. Here, I added magnets to the back of an altered cookie sheet. This turned out super cute. I added a mirror, matted photo of Edward & Bella, decorative papers, prima flowers, and chipboard magnets, and ribbons to hold in different papers. I think that this turned out much more useful than the plain altered magnets. You could even put this on your fridge and use it as a kitchen message center.

A Twilight Locker Organizer

Thursday, October 28, 2010

Scrapbook Altered Vintage Lunch Trays

A while back I picked up about 50 of these square metal lunch trays.  I didn't have an special plan for them, but I figured that I would be able to do something with them.  I came up with this little scrapbook project.   

First, I painted the trays because some were a little rusty.  Then, I used clear varnish to seal the paint on.  Next, I cut down the scrapbook paper to fit and cut a couple of mats.  Finally, I used prima flowers attached to magnetic strips to hold down the photos or notes.  If you wanted to make this for a locker organizer, which would make a great teen/tween gift, you could also add the self adhesive magnet strip to the back.  I actually just clipped binder clips onto the top of the frame so that it could hang on the wall. 

Saturday, October 23, 2010

First Folksy Sale!

Lisa & I stumbled upon this great new site for crafts, http://www.folksy.com/.  It's like the etsy of Europe.  We just started a few days ago and now have our first UK sale (from Folksy).  It's really a nice up and coming website.  I love to get in on the groundfloor of a new concept. 

It's a great site if you have a European style and has some really super kid's clothing.  We are very excited to be a part of it.   

Monday, October 18, 2010

Easy Christmas Ornaments Crafting Roundup

I decided over the weekend that it is time to start Christmas Crafting.  This is partially due to the shows Lisa & I have coming up, but also due to the fact that I always find myself awake at 3am on Christmas Eve putting the finishing touches on gifts (sometimes even on Christmas morning.) I usually also have a stack of partially finished things that I just give up on.  Maybe I aim too high, but why not?

So, a few times a week I am going to start putting together some small treasuries of things to make from Christmas this year.  This roundup is simple, easy, and dare I say cheap Christmas ornaments.  Looking at these, I think that any one would be great for kids to make.  Kamille and Maggie would love making the beaded ornaments. 


Santa & Snowman Ornaments   Beaded Christmas Ornaments  Quilled Christmas Trees

Poinsettia Felt Ornament  Pompom Ornament  Snowman Glass Ball Ornaments


My Favorites - Handprint Christmas Ornaments 

I think that I will start making these every year.  What a wonderful way to watch your child grow up.


Tuesday, October 12, 2010

Altered Canvases

This is a fun little project I did for Kamille's room.  I saw somthing like this on TV and decided to make my own mini version.  To make the project you need:

Doll Hangers ($3.00 for 4)
Mini Canvas - I actually use one of the $1.00 pre-printed canvases from the dollar section at Michaels/JoAnns or the Dollar Store
Ribbon
Tulle
Flower,
Scrapbook Paper
Paint


The first step is to paint the canvas in a color that coordinates with your theme.  On the right, I painted the canvas black.  On the left, I used a convas that was already painted purple (it had ugly flowers painted on it - from the dollar store).  Once that is dry, I cut a piece of scrapbook paper to fit.  Then I added some title enbellishments from the scrapbook section.  To make the skirt, I gathered a piece of tulle on the sewing machine (But you could just gather with a needle and thread or gather it as you glue).  I hot glued the tulle tutu skirt into the bottom edge of the canvas.  Then, I glued down a piece of ribbon or other decorative trim over the top.  Finally, I added the flower as an embellishment.  

I tacked the straps onto the hanger with a dab of hot glue.  Then, I glue them onto the front of the canvas.  Finally, I covered that up with ribbon bows.

You can put a photo on the scrapbook paper.  I haven't gotten that far yet, but I will probably put a pic of Kamille and a couple of her friends on these little photo frames.  You could make a really huge version of this with a child's hanger.     

Monday, October 11, 2010

Printable Coupon ~ Michaels

Here's to helping you get your craft on! Pick one or all, print and save!

Save 50%  on one item at Michaels today, October 11th
or Save 40% on one item, Tuesday, October 12th ~ Saturday, October 16th.
You can also print a coupon good for 40% off your total purchase, now through Saturday, October 16th. This includes sale and regular priced items!! Wow!

Wednesday, October 6, 2010

Mini Apple Muffins for a Healthy Preschool Snack

I am snack mom again.  It seems like it was just a week ago, probably because it was.  None the less, I came up with this great little recipe for mini apple muffins.  I "frosted" the minis with whipped cream cheese that I sweetened with a small touch of honey.  Mostly, I figured that "frosting" might get the picky eaters to try these little muffins. 

These muffins are low fat, lower in sugar and high fiber. 

Here is my recipe:

Preheat your oven to 375. 

Mix 1 egg, 2 tbs butter, 1/4 low fat sour cream, 1/2 brown sugar, and 1 tbsp milk.

Mix dry ingredients: 1 cup wheat or white flour, 1/2 cup flax seed meal, 1/2 wheat germ, 1/2 tsp baking soda, 1/2 tsp baking powder

Add dry ingredients into wet ingredients. 

Mix in 2 medium apples diced

Bake about 8-10 minutes in the greased mini muffin tin.


"Frosting" - 1 package low fat cream cheese & 2 tbsp honey - whip with mixer for 5 minutes until it is really fluffy.  Then, pipe it on with a small star tip.  Keep these in the fridge. 


We used fresh apples picked from our local apple orchard, Spicer's on our Friday preschool field trip. 

Sunday, October 3, 2010

Yum! Candy Corn Crochet


I found a quick and easy crocheted treat bag pattern for free over at Crochetville.  I was able to whip it up in about 20 minutes. My girls are already asking for more to use as treat bags for Barbie. These would make great favor bags for friends. Just fill with candy, close with a ribbon threaded through the hadles and voila ~ you have a super fun and easy treat for you child's friends, teachers, bus drivers, etc.


I had also considered making one for Isabella's teacher and filling it with this yummy cappuccino mix recipe that I found on All Recipes. The treat bag will hold three to four servings placed in a plastic ziplock bag and sealed. Put the mix in the treat bag and tie the directions to the candy corn with a decorative ribbon and your sure to make someone's day!

Cappuccino Mix ~ Makes 24 servings

Ingredients

  • 1 cup powdered non-dairy creamer
  • 1 cup instant chocolate drink mix
  • 3/4 cup instant coffee granules
  • 1/2 cup white sugar
  • 1/2 teaspoon ground cinnamon
  • 1/4 teaspoon ground nutmeg

Directions

  1. In a medium sized glass jar, combine the non-dairy creamer, chocolate drink mix, instant coffee, sugar, cinnamon and nutmeg; mix well.
  2. To prepare, place 2 tablespoons mix in a mug, pour in 3/4 cup boiling water, and stir until dissolved. Serve hot.
Happy Crafting!!

Free Kid's Craft Idea Everyday

When checking my email this morning I came across an email update from Free Kid's Crafts. I can't believe I haven't shared this site with you guys yet! Everyday in my email I recieve a new kid's craft that goes along with the season or holiday that is currently approaching. The projects are generally very inexpesive and use materials that I have on hand. It's the perfect way to keep little hands busy while you do a project of your own.

This morning's craft came as this tissue paper pumpkin:


To subscribe to the newsletter and get a free craft idea emailed to you everday just fill in your name and email address under the Subscribe tab on the left hand side of the page.
They make it kind of fun because you can't see the crafts for the coming days but you can access the craft archives by clicking a previous date on the calendar an left hand side of the page (under the subscribe tab).

Check out Friday's Craft ~ an October Coloring Calendar

 
Let your little one color this to uses as a chore chart or a count down to trick or treating on Halloween by placing stickers on each day until Halloween! It's a simple yet fun way to get them excited about the holiday.


Facebook Graphics Myspace Happy Halloween Comments Mermaids
Free Photos Angels Fairies Mermaids Gothic Photos Glitter Graphics
http://www.free-foto-animation-digital-images.blogspot.com/

Saturday, October 2, 2010

E is for Embellishment: Tips, Tricks, Tutorials & More

Part of our sewing series is going to be E is for embellishment.  I was thinking about doing elastic, but that is so much less exciting than embellishments. 

When it comes to sewing there are MANY types of embellishments.  I would recommend that you look at my A is for Applique post and free applique tutorial as a starting point.
Flowers

Also, we have a free tutorial on layered felt flowers that are a great way to embellish sewing projects.  There are so many great flowers you can make.  If you don't want to make flowers, try buying a premade flower and adding it as an embellishment.
  I added ribbon roses and bows to the front of this Halloween costume to give it that over the top look. 

Check out our fabric flowers tutorial round up for lots of free tips and tricks on making fabric flowers.


Ribbons & Bows
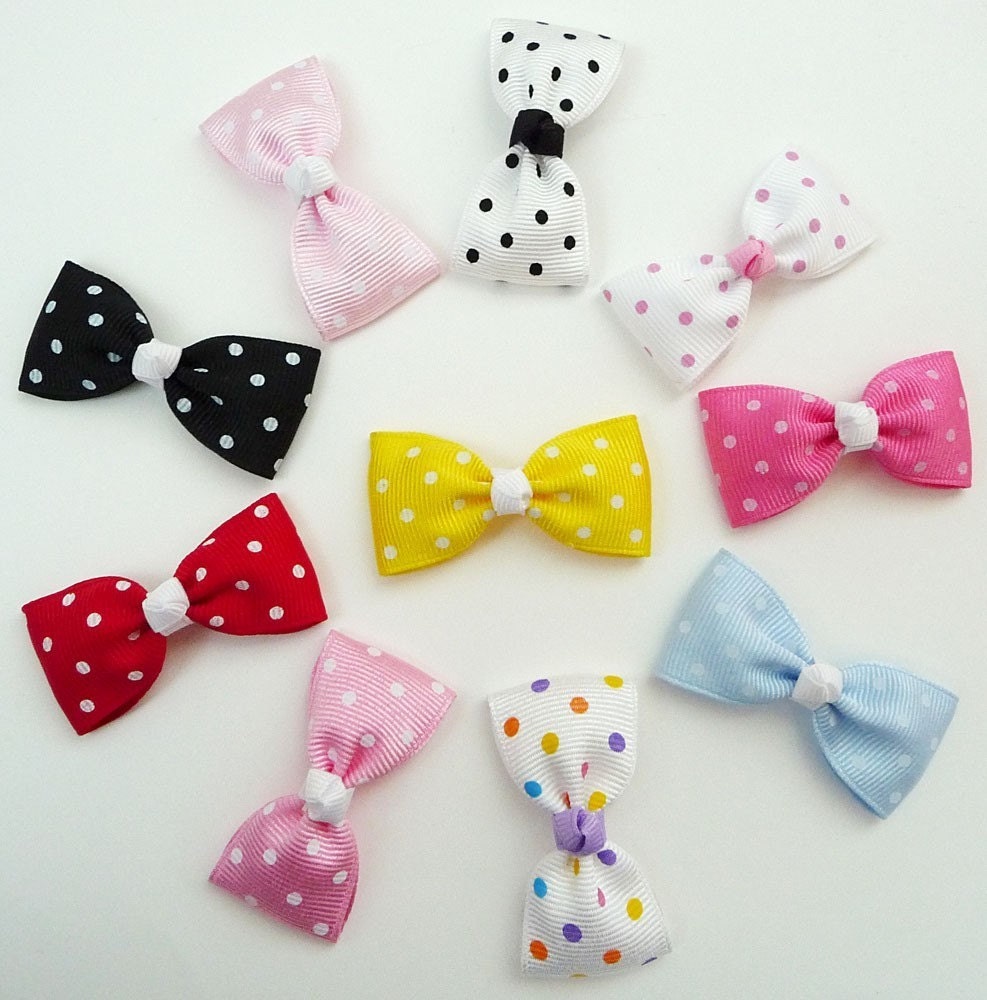
Some of my other favorite embellishments are ribbons and bows.  A simple little bow can make a huge difference on a project.

Our tip to making bows - seal the ends with a lighter.  You just barely pass over the end and the ribbon will heat seal to prevent fraying.   

I added a simple bow to both of these projects just to make them slightly more feminine. 

Check out our tutorial on hair bow holders for bow making tips and my free mini tutorial on making corker ribbon. 

Appliques
Our A is for Applique tutorial roundup featured our very own mini applique workshop and lots of great ideas for using appliques. 

BTW, Lisa will be launching a companion applique line to compliment our sewing patterns in the next week or so.  We are really excited to be able to offer some great applique designs that anyone can use to make wonderful gifts for the Christmas Season. 


Check out this adorable pair of applique baby booties.  I am going to be making the pattern in larger sizes this week for children's slippers.  Mostly because every time Kamille sees the sample booties she starts to demand a pair for herself.  I'm not going to lie, I would wear a pair of these around the house in the winter.  The larger pattern will have no skid bottoms sewn on. 

Really there are so many embellishments from buttons, to trims, to appliques that it is hard to cover everything in one post.  I will leave you with our newest etsy treasury full of really great handmade and vintage sewing embellishments that are very affordable and available on etsy.  I personally would rather see my funds going to other crafters than to giant corporations where I can help it. 


'E is for Embellishment' by c1h8r9is

I wanted to create a showcase for my blog to promote craft supplies on etsy. I think that there are many people who don't know that you can buy extremely unique supplies on etsy at really affordable prices. www.boutiqueit.blogspot.com.

Mini Wool Felt Aqua...

$5.00
Stamped Muslin Ribb...

$5.00
New- sweet vintage ...

$6.85
30 Handmade Crochet...

$7.25
Farm Fresh BAKERS T...

$3.25
Robots and Owls BUT...

$4.50
PINK AND BROWN FLOW...

$3.50
Moda Wee Play 42 Fa...

$128.00
Handmade organza, s...

$9.99
RECLAIMED FABRIC 6 ...

$6.00
New Handmade Polyme...

$4.00
B3G4TH FREE NEW-Sch...

$4.00
10 pcs of 25mmX50mm...

$5.00
Pink Chiffon Roses ...

$10.00
20 Handmade 2 Inch ...

$5.25
BEAUTIFUL TRIM RIBB...

$0.50

Happy Crafting!

Working with Cork Fabric

So, I am not an expert in this - based on using it for one project.  However, I did a lot of research before buying it and watched quite a f...