I have about 5 tutorials/ideas here for making your own holders. Call me crazy or just plain cheap but I almost had a heart attack when I saw that people were paying $10-$30 for these things. I get it, the hand painted ones have some work involved (not as much as you think - I just painted an entire play kitchen in 2 hours). But, seriously, this is a NO SEW - Hot glue project that is ideal for using up scraps you have around the house. This one is really a freebie if you are a crafter because you probably have all of this stuff. If not, you could get everything you need: glue gun, felt, appliques, flowers, ribbon, hot glue sticks, beads, etc. from the dollar store. So, even if you have to buy everything, you can make a fancy hair bow holder for less than $10 easily. I think that these would be great birthday or Christmas gifts. I might make a fancy one for each girl in preschool for Christmas.

You could also use the little mini canvases. I made a couple into photo frames with some scrapbook papers.
mytatteredangels.com - one of my favorite blogs for mixed media/scrapbooking has this great little canvas just to give you an idea of what I am talking about, but you could just use one of the prepainted canvases - they are everywhere. I know Target had little prepainted canvases that matched Kamille's comforter and I have seen them with initials and many other things.

Upcycled CD
For this project I made the standard round hair bow holder. Instead of painting it, I used felt.


I cut a length of 2 types of ribbons. One is fatter than the other so I can layer them.
I glued the double layer of ribbon down onto the back piece of felt. I left a tail at the top about 1" so that I can put a nail in it to stick in on the wall. Then I glued over the whole backing piece.


I stuck the CD down onto the backing piece and then I glued to front piece of felt down. This way I used up a useless old CD and made a stiff and perfectly round circle for my hair bow holder.


Now it's time to decorate. I didn't feel like putting an initial down so I just ironed on a glitter heart applique I had. If you wanted an initial, you can buy many different premade varieties or you can just print out the size and style of letter you want to a word processing program and use it as a pattern piece to cut out the monogram out of fabric.

Then I glued down a big bow. I am going to tell you how to make corker ribbon now. It's so easy (but you could just buy a fancy bow at the dollar store)


Premade Wooden Bow Holder
I also have a bunch of prepainted wooden dodads lying around. They are like $1.00 already painted at the craft store.
I basically did the same thing.


Photo Frame Bow Holder
This is a little 4x6 frame that would work well holding baby bows or little barrettes. I would use a bigger frame for bigger girls. I had this one lying around. I actually saw a really beautiful one that used a really ornate frame and I might make something similar for Kamille dress-up area.


I started out with a frame and removed the glass and cardboard. I put it face down on some fleece (because I have it and I am out of batting). I used 2 layers to give it some fluff.
Then, I glued the fleece onto the frame base. See how I cut it a little smaller that the back of the frame. If you don't it will be too bulky and it won't fit back into the frame.

Next, I took a piece of fabric (if you are making this for a baby - use one of the receiving blankets you got. I had sooo many that just went unused.)


I glued it on to the back gift wrap style.


Then I cut a few pieces of ribbon (rick rack would have been cuter, but I'm out). And tacked those down on the back of the frame backing. This is where you clip the bows so you don't want to glued onto the front, only the back.


Then I shoved the whole thing back into the frame. It took a while to get it in there because of the bulk, but I did. I glued a bow onto the top just to give it a girly touch.
TUTU HAIR BOW HOLDER
Everyone has seen this one. It is actually really easy to make and there are so many things that you can do. It would have been super cute with some flowers added onto it, but it is getting late and my enthusiasm is waning.
I freehand sketched out the shape of the bodice onto a piece of cardboard (it's a mailing envelope I am recycling because I get about 10 of these a week in the mail from clients. I hate throwing them out.)


I cut it and 2 layers of fabric out at the same time. Then, I glued one of the pieces of fabric down as the backing.


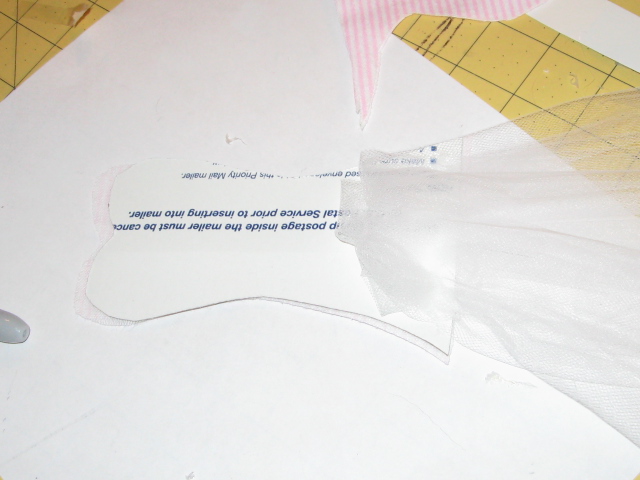

Then, I glued down the front piece of fabric over the whole thing. I pushed it down to have less bulk where the tulle is. I glued down some trims to make it more decorative. You could also use bows, flowers, gems, etc. I glued a handle onto the back with a little loop of ribbon


HAPPY CRAFTING!


No comments:
Post a Comment