Showing posts with label birthday. Show all posts

Monday, April 16, 2012

Floss Keepers

I was starting the get a huge tangled mess of floss this weekend as I have been embroidering all of the faces for my new line of PDF Doll and Animal Sewing Patterns. 

Instead of letting it get to the point where I just give up and throw out all of the floss, I decided to make up some floss keepers.  I cannot even remember where I saw this but someone used clothespins to organize their floss. 


Basically, you put the tail into the pin, wind it around and clip the other tail into the pin.  This is so useful.  It really keeps the floss organized.  But I wanted something less plain.  I started thinking about these altered clothespins that I always see on papercrafting sites.  I never made them because it seemed like something pretty useless.  Now I have a reason to make these altered clothespins. 


 I started with a couple of scraps of scrapbooking paper.  I cut the paper down into little sticks the size of the front of the clothespins. 

Then I applied double stick tape to each clothespin.

 Then, I attached the paper onto the clothespins and wound the floss around each pin. 
 I threw a few extras into my sewing basket for the scraps of floss.

I thought that this would make a great gift.  Clothespins are $1.00 for 30.  So, you can make up several sets for under $5.00.  This might be a nice craft show item.  Also, my niece just made up a friendship bracelet kit for one of her friends and she wound floss around business cards or something like that.  This would be much cuter.  Some spools of floss, beads, safety pins tucked into a little makeup bag.  That would be a sweet and affordable gift.

Because I already had everything out, I wanted to make up a set for my sister's birthday.
 I've seen photo puzzles with clothespins, so I decided to make up a set of the floss keepers with a photo of my niece.
 I just sliced up the photo and taped it onto the clothespins.  I think that it would be a cute gift for a birthday or Mother's Day.

Saturday, February 4, 2012

Animal Party Gift


We have a birthday today and I thought that I would make up a couple sets of these little animals.  Kamille is completely obsessed with putting collars and leashes on her little pets.  So, I came up with the idea of using hair rubber bands to make the collars so I didn't have to constantly keep tying ribbon onto these little animals.  While I was at the Dollar Store picking up the hair bands, I also got those little plastic barretts shaped like bows for the animals ears, the clippy barretts to make earrings, and the ribbon for the leashes. 

 Last time I used some charms on the collars that I had in my stash, but I lucked out and found a pack of hair rubber bands that already had charms on there.
I just took a decent length of ribbon and hot glued it into the hair rubber band, covering the metal closure part.  Then, I looped around the other end and glued it into a handle like a leash would have. 


For the earrings, I took the little clippies and hot glued flowers and other doodads I had around the craft room onto them to make sets of earring.


I also made mini pet beds and outfits.  I will try to post the tutorial for the outfits with the pattern later this week. 

Sunday, January 23, 2011

Wooden Fairy House Tutorial

I was sooooo busy at Christmas that I didn't have time to get all of my projects photographed and blogged.  This is a cute little fairy house that I put together for Kamille.  I am getting so tired of plastic junk that breaks and has a ton of tiny pieces that immediately get lost.  She was desperate for the Pixie Hollow magical fairy house.  She already has a fairy jewelry box/house that she never plays with.  I loved this build a tree house kit, but it is +$130.  The pieces make a house that is about 22" tall. 
For my smaller version that is about 12" tall, I used 3 wood clock faces from Michael's.  They are in with all of the wood burning and other wood things.  I actually wanted to make 1 more tier with a huge wood slice, but they didn't have any.  I also planned on using branches instead of a dowel, but it just got too cold and snowed before I could go out into the yard and cut some.  So, I just used a dowel to make the supports.  I screwed them into the wood slices after pre-drilling the holes.  The whole project could use a few coats of sealant, but I need to wait for slightly warmer weather to seal it. 

 I also made a coffee table and a little felt leaf couch for the house.  Kamille got a bunch of little princesses that came with furniture, so she is also using that in her house. 

I made this little rug out of felt. 

 Here you can see the leaf hammock bed and the tiny blanket and pillow I made from felt.  I just hot glued the hammock onto the posts. 


One additional element you cannot see is the little ladder that the fairies can climb to get from one level to the next.  Kamille has been playing with this little house everyday.  It seems much sturdier than the plastic cottage.  Plus, there is some room for imagination.  It doesn't talk or light up or sing.  It is 100% powered by creative play.  Also, the project was more in the range of $30.00, rather than $130.  It may not be as fancy, but it also doesn't take up half of her room.


Saturday, January 22, 2011

Teacup Piggy Project

This year all Kamille wanted for Christmas were 2 teacup pigs, which she was calling purse pigs.  So, I tracked them down and they were actually pretty affordable - $12.99 for the pig and it's plastic teacup.  I wanted them to be a gift from the man in red, so I needed them to have a bit more pop than just presenting naked pigs under the tree. 

Last year we did a post on upcycled dog toys.  One of the items was from a blogger who took an old suitcase and turned it into a small dog bed.  I don't have a small dog, but I still had that project in my mind because it was so cute.  So, I decided to take this old rummage sale find - a hairdryer case - $2.00 and turn it into a little bed for the piggies. 
 This project wasn't hard and had a lot of give because all of the trim covers up an little mistakes you may make.  However, it took several hours.  First, I used hot glue to put a layer of fleece on the outside of the case, top and bottom.  I wanted it to look upholstered.  Once I had the fleece on there, I trimmed away the excess.  Next, I added the fabric with more hot glue.  It is a slow process to smooth out the fabric and get it looking just right.  Use HIGH temp glue for the best results.  I then trimmed away the extra fabric.  Then I used ribbons to form a decorative band around the edges and to cover the fabric.  I also glued some trim onto the handle strap to jazz it up. 
 
 After that, I used the same ribbon trim to make some "hinges" that would hold the case open.  I added the self-sticking hooks to hold extra clothes (which are mia somewhere in Kamille's room right now) and accessories.  Finally, I filled the bottom with stuffing and then glued in the leopard fabric to make the bed.  I left enough room that she can close the case with both pigs inside and carry it around or store it.   
  I also made some outfits for the pigs.  They sell outfits that retail for about $10.00 - which is crazy.  Plus, the outfits have arms and legs.  No 3-year-old is getting the arms and legs of one of these little pigs through the sleeves of some tiny outfit.  I based my pattern on a dog coat.  It velcros under the neck and tummy.
 The final item I made was this little purse that holds both of the pigs. 

Glitter Scarf Tutorial

My niece and daughter are totally obsessed with glitter/sequin scarves.  Those things are expensive.  I personally have a hard time justifying spending $15-$18 on an accessory for a 3-yr-old or even a 7-year-old.  So, this Christmas, Lisa and I made up a bunch of the scarves at much more affordable prices.  I have a NO SEW and a LOW SEW version of the scarves below.  JoAnn and Walmart both sell a fabric they call confetti dot fabric.  It comes in about 10+ colors.  The fabric is about $6.00 a yard (but you can score it for much less with a coupon or buy purchasing a remnant).   

 Because this fabric does not run or fray to speak of, you can make a really cute scarf by just cutting an 8" strip.  If you cut anything narrower, it tends to roll (which makes a nice scarf for American Girl Doll).
I also made a doubled version by cutting 2 8" strips and stitching them together.  I left the ends open for turning. 

These scarves a played with/worn around here everyday.  The single scarf is about $1.00 and the double scarf is about $2.00 (when you buy the fabric with a coupon).

I made the no sew scarves a couple of years ago as party favors for my niece's glamour makeover birthday party.  They were a hit. 

Friday, November 5, 2010

Christmas Gift Tutorial Roundup - Elementary Aged Children

Nintendo DS Cases

There probably isn't a hotter gift item for kids in this age group than the DS.  It is a must have.  So, whether you are crafting for a boy or a girl, a DS case would make a great gift. 

This drawstring case from Mariska is one of the simplest ideas for a case I have seen.  It makes me want to make a few for my upcoming craft shows.

Notice the little pocket in back for the games.  Check out the DS case tutorial here.


This is another great Nintendo DS case tutorial from Kender Crafts.  Plus, her blog is awesome.  I didn't see an idea on there I didn't like. 

I Spy Bags
This is also from Kender Crafts, but you can find the tutorials everywhere.

I Spy stuff is huge with this age group as well.  One word to the wise, Lisa & I tried these and I just could not a get a product that I wanted to sell, but for gift giving, they were fine.  The plastic pellets can be pricey, so bring a coupon.  Kamille plays with her monster I Spy bag every time she comes across it in her toys.  Find the I Spy Bag Tutorial here.

Tool Belt
This is a great tutorial because you could make it into so many things, a garden apron, art smock, etc.

Check it out over at Seven Little Monkeys.

Fabric House Tutorial
The reason I didn't call this a doll house is that with some fabric selection it can go boy or girl.  Try a safari/jungle look for zhu zhu pets or to keep all of those annoying little pop up pets in.


Lunch Bags
This is a cute pattern for a fun and fast lunch sack.  You can also check out my tutorial on the Busy Beaver Lunch Sack.


Tissue Holder


This is another cute little idea.  I doubt you need a tutorial to make it.  Add a loop to hand from the backpack. 

Back Pack Doo Dads
Now the Sesame Street kind might be too babyish for elementary, but this tutorial was TOO cute to pass by without sharing.

Check out the tutorial over at Craft Passion.
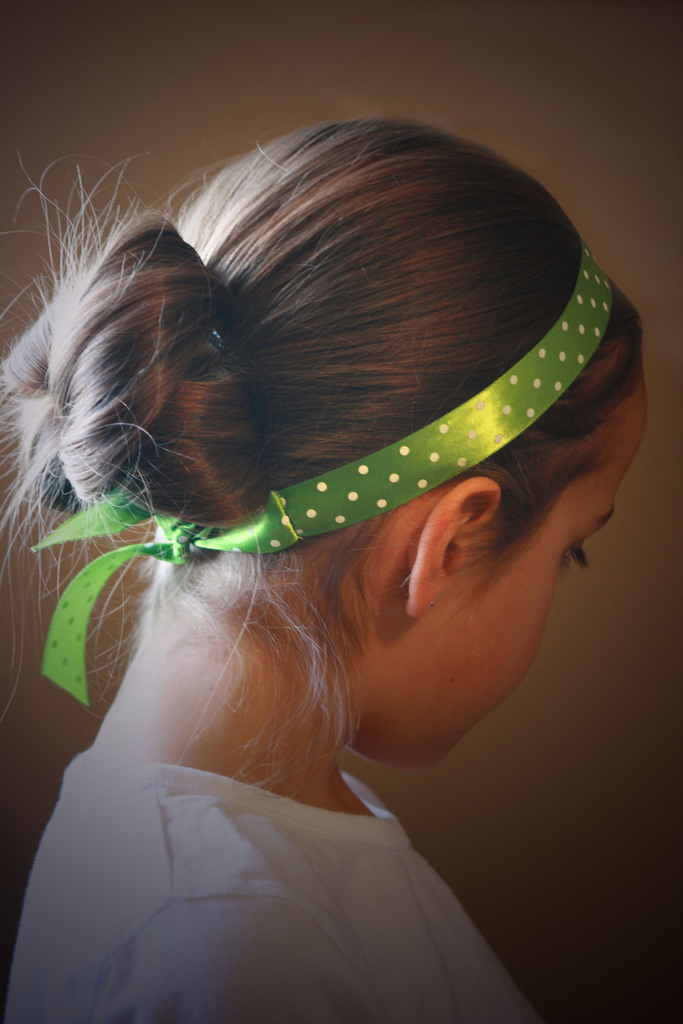
Headband Tutorial

This ribbon headband tutorial seems too simple, but there is a great hint involved that is worth checking out. 

Tutorial from Chocolate on my Cranium.


Working with Cork Fabric

So, I am not an expert in this - based on using it for one project.  However, I did a lot of research before buying it and watched quite a f...