Showing posts with label technique. Show all posts

Tuesday, January 4, 2011

5 Fun Tutorials For Using Cupcake Liners


Aunt Peaches shares an awesome tutorial for making this Ruffled Lotus Lantern.

===========================================================


Paper Crave has this great tutorial for a cute cupcake tree. This would make a sweet addition to any Valentines decor:)

=========================================================


The Lovely Paper Blog has a nice tutorial for making these adorable flowers!

===========================================================


The Single Nester has a super easy tutorial for how to make this heart shaped wreath.


Craft Gossip shows us how to make these yummy little treats that use a cupcake liner as the base! 


Wednesday, September 29, 2010

D is For Darts

When sewing garments and accessories darts are an essential technique to master in order to create a great fit/shape. Darts can be straight or curved depending on desired effect. A straight dart will give you an easier, looser fit while a curved dart will be more form fitting.

===========================================================================

Check out this tutorial on one of my personal favorite sites, Sew Mama Sew. This blog is amazing! Full of great tips, tricks, and tutorials. I have to admit I like to check it out every day! It goes over the importance of darts in the fit of a garment with and easy to follow picture tutorial and instructions. The triangle areas seen in the photo below represent the actuall dart placement on the garment pieces, in this case a dress. Darts will be used in this instance to take in the fabric where each dart is placed to create a formed fit.

==============================================================================


eHow has a great, easy to follow tutorial for sewing darts into any fabric project.


===========================================================================

Joanna over at Stardust Shoes has a great tutorial showing you how to take in your pants using butt darts.


===========================================================================

Check out this fun and elegant pleated bag tutorial from Lisa Lam (which is funny because that's my name too!!) at U Handbag. With a change of fabric, this would be perfect for a wedding or holiday party. In this instance, the darts give the bag a fun shape and detail.


============================================================================
Threads Magazine has a great video collection. Included in this collection are two videos that would be useful for marking darts and sewing darts in your fabric projects. This collection is a super valuable tool for novice and intermediate sewers.


=============================================================================
Happy Crafting!

Saturday, September 25, 2010

C is for Chenille - Roundup and Tutorials

Making Your Own Chenille

This is a great tutorial on making your own chenille fabric from freshvintage.typepad.com.


She does a wonderful job of explaining exactly how to create the traditional chenille fabric.  I actually thought that the piece of fabric she created and then used to make the doll body would have made a beautiful chenille baby blanket.  Click here for her full free tutorial on chenille.


Over at the Happy Things blog, she has a wonderful tutorial on making simple baby bibs backed with commercial chenille. 


Click here for her free chenille tutorial and to take a look at her beautiful blog.  


I have long loved vintage chenille and I always see vintage chenille bedspreads at really affordable prices at flea markets, garage sales, and antique stores. 

Here are some of my ideas to making things out of old chenille:

Bibs
Diaper Bag
Pajamas
Pillow cases
Baby/Toddler Jacket
Baby toys
Dolls
Monsters
Slippers
Nursing Pillow Cover
Window Valance
Bunting for baby room

You could cover those huge cardboard letter in chenille. 

You could also use chenille to upholster a chair for a child's room or to create a sweet cushion cover for a rocking chair.

Basically, you can look at a vintage chenille bedspread as a huge piece of fabric.  I know some people don't like the idea of cutting up vintage linens, but what good is it just sitting in a closet somewhere.

I would love to see a vintage chenille bedspread made into a whole gift set for a baby shower: burp cloths, bibs, a small crib blanket, baby booties, diaper bag, diaper organizers, mommy journal or photo album cover.  How sweet would that be to present at a shower?

  HAPPY CRAFTING!


Wednesday, September 22, 2010

B is for Bias Tape: Ideas, TIps, and Tricks

What is bias tape?

For a beginning sewing bias tape can be very intimidating.  In fact, I have been sewing since I was 4 and I just started using bias tape about 2 years ago.  I used to have my mom come over and put the bias tape on any project I needed it for.  Then, one day she wasn't around and I had to do it myself.  It actually is much easier to work with than you might think. 

In technical terms, Bias tape or bias binding is a narrow strip of fabric, cut on the bias (UK cross-grain). The strip's fibers, being at 45 degrees to the length of the strip, makes it stretchier as well as more fluid and more drapeable compared to a strip that is cut on grain. Many strips can be pieced together into a long "tape". The tape's width varies from about 1/2" to about 3" depending on applications. Bias tape is used in making piping, binding seams, finishing raw edges, etc.

Commercially available bias tape is available as a simple bias tape, single-fold bias tape, and double-fold bias tape. Single-fold bias tape is bias tape that is folded in half lengthwise on its center line, wrong side together, and pressed. Double-fold bias tape is single-fold bias tape where each half is again folded in half lengthwise, wrong sides together, and pressed.  - http://www.apparelsearch.com/definitions/miscellaneous/bias_tape.htm


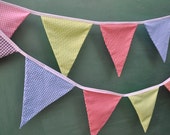
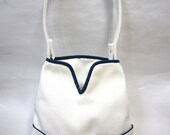
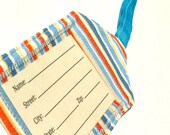
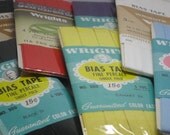
What can you do with bias tape?  I created this etsy treasury to show that many kinds of bias tape available and some of the creative projects people are making with bias tape.

'B is for Bias Tape' by c1h8r9is


granny bag sewing p...

$7.50
Vintage Notions Ban...

$12.50
Bumble Bee Dolly an...

$20.00
Kimberly Royal Bias...

$2.75
Christmas Owl Banne...

$60.00
Sunglass Case / In ...

$5.00
Linen bias tape -- ...

$7.50
Sweet and Simple PO...

$4.00
Trendy Flared Full ...

$26.95
Fabric Bunting - Pa...

$19.00
Handbag Like A Whit...

$118.00
Out of this world l...

$7.00
The Wright Rainbow ...

$8.00
Orange Flowers Chec...

$7.00
BUBBLEGUM PINK GING...

$8.40


Lisa and I also have a few patterns that use bias tape.  One of my favorites is the rumba ruffled diaper cover. 


We used bias tape to make an easy elastic casing for the diaper cover. 

Here is a great tutorial on applying bias tape from sewneau.com:


Click here to find the step-by-step guide to applying bias tape and many other great tips and tricks.

Another great tutorial on applying bias tape is provided by Wrights - one of the leading commercial manufacturers of bias tape.


Click here to take a look at their free bias tape tutorial.

Monday, September 20, 2010

A Sewing Alphabet - A if for Applique - Tutorials, Tips, and Tricks

A is Applique - Tutorial and Ideas Round -up

I just thought that I would share this funny story about my daughter.  Every night we go through the alphabet and come up with a word for each letter - A for Apple, etc.  Last night she wanted me to do the entire alphabet in sewing terms.

That's how much time I've been spending in the studio.   Even my 3-year-old is obsessed with sewing now.  So, I thought that I would make a weekly feature of going through the alphabet and bringing you great products, tips and tricks for each letter. 

This is a great step-by-step tutorial from SewMammaSew's blog:

This is an adorable blog, full of great ideas and inspiring products.  SewLikeMyMom - she's just a mom with two adorable kids and lots of fun ideas for projects.  There are some really great things that you will want for your portraits. 


Now, here is my tutorial for simple appliques.  I know that everyone loves fusible web, but it isn't always the thing I want to use on projects.  Plus, it's actually a little expensive.  I learned this technique from Mrs. Lamb - a wonderful quilting instructor who used it on a baby quilt for my niece, Maggie Rose.

You need cotton that you want to applique and TULLE. 


For small appliques it is easier to use the spooled tulle because it's easier to control.  For larger projects you might need tulle by the yard. 

You will layer the tulle over your fabric.  If you are using a specific design, you should pin it down or trace it onto the 2 layers of fabric. 

 It's hard to see but there is a layer of tulle on this cotton.

With both layers, cut out your shape.  For the tutorial, I just did a heart to show that you can use this technique on rounded shapes.

Sew around the entire shape.  For a rounded shape you want to clip around the perimeter so that it will turn smoothly.


On the tulle side, you need to clip a small hole.  You use this hole to turn the piece.


Now you have a piece that is turned.  You need to press it to get a crisp, perfect edge.  Start with the iron on the lowest setting and before it really even starts to heat up, press the edges down.  The tulle can melt, so you want a barely hot iron when you start.  Once the edges are pressed down, flip the piece over, turn up the iron and really press the whole piece.


Now you have a lightweight applique that you can straight stitch down onto the piece.  This is great for stretch fabric, like onesies, t-shirts, etc. that stretch when you try to use a satin stitch.  It is also nice for lightweight and delicate fabrics that might rip or fray from a satin stitch. 

Here are some great tutorials from Cut Out and Keep!


Happy Sewing!


Working with Cork Fabric

So, I am not an expert in this - based on using it for one project.  However, I did a lot of research before buying it and watched quite a f...