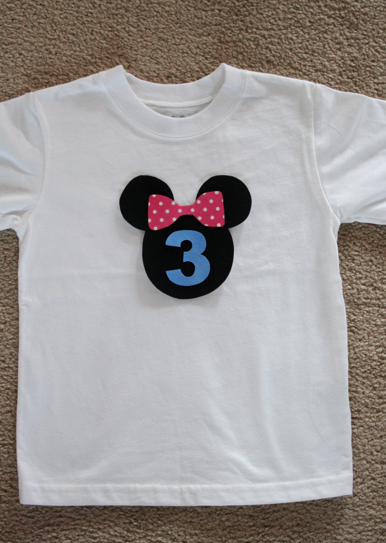
A is Applique - Tutorial and Ideas Round -up
That's how much time I've been spending in the studio. Even my 3-year-old is obsessed with sewing now. So, I thought that I would make a weekly feature of going through the alphabet and bringing you great products, tips and tricks for each letter.
This is a great step-by-step tutorial from SewMammaSew's blog:
This is an adorable blog, full of great ideas and inspiring products. SewLikeMyMom - she's just a mom with two adorable kids and lots of fun ideas for projects. There are some really great things that you will want for your portraits.
Now, here is my tutorial for simple appliques. I know that everyone loves fusible web, but it isn't always the thing I want to use on projects. Plus, it's actually a little expensive. I learned this technique from Mrs. Lamb - a wonderful quilting instructor who used it on a baby quilt for my niece, Maggie Rose.
You need cotton that you want to applique and TULLE.
For small appliques it is easier to use the spooled tulle because it's easier to control. For larger projects you might need tulle by the yard.
You will layer the tulle over your fabric. If you are using a specific design, you should pin it down or trace it onto the 2 layers of fabric.
It's hard to see but there is a layer of tulle on this cotton.
With both layers, cut out your shape. For the tutorial, I just did a heart to show that you can use this technique on rounded shapes.
Sew around the entire shape. For a rounded shape you want to clip around the perimeter so that it will turn smoothly.
On the tulle side, you need to clip a small hole. You use this hole to turn the piece.
Now you have a piece that is turned. You need to press it to get a crisp, perfect edge. Start with the iron on the lowest setting and before it really even starts to heat up, press the edges down. The tulle can melt, so you want a barely hot iron when you start. Once the edges are pressed down, flip the piece over, turn up the iron and really press the whole piece.
Now you have a lightweight applique that you can straight stitch down onto the piece. This is great for stretch fabric, like onesies, t-shirts, etc. that stretch when you try to use a satin stitch. It is also nice for lightweight and delicate fabrics that might rip or fray from a satin stitch.
Here are some great tutorials from Cut Out and Keep!
See Cute Doggy Applique Teeshirt Recon and 1000's of others - or share your own on Cut Out + Keep
See How To Applique and 1000's of others - or share your own on Cut Out + Keep
See Cute Felt Appliques and 1000's of others - or share your own on Cut Out + Keep
Happy Sewing!


No comments:
Post a Comment