Monday, September 20, 2010

A Sewing Alphabet - A if for Applique - Tutorials, Tips, and Tricks

A is Applique - Tutorial and Ideas Round -up

I just thought that I would share this funny story about my daughter.  Every night we go through the alphabet and come up with a word for each letter - A for Apple, etc.  Last night she wanted me to do the entire alphabet in sewing terms.

That's how much time I've been spending in the studio.   Even my 3-year-old is obsessed with sewing now.  So, I thought that I would make a weekly feature of going through the alphabet and bringing you great products, tips and tricks for each letter. 

This is a great step-by-step tutorial from SewMammaSew's blog:

This is an adorable blog, full of great ideas and inspiring products.  SewLikeMyMom - she's just a mom with two adorable kids and lots of fun ideas for projects.  There are some really great things that you will want for your portraits. 
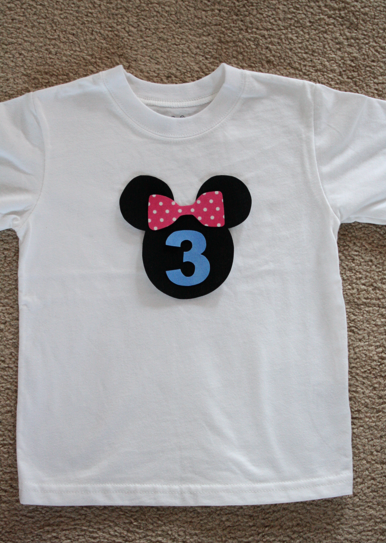


Now, here is my tutorial for simple appliques.  I know that everyone loves fusible web, but it isn't always the thing I want to use on projects.  Plus, it's actually a little expensive.  I learned this technique from Mrs. Lamb - a wonderful quilting instructor who used it on a baby quilt for my niece, Maggie Rose.

You need cotton that you want to applique and TULLE. 


For small appliques it is easier to use the spooled tulle because it's easier to control.  For larger projects you might need tulle by the yard. 

You will layer the tulle over your fabric.  If you are using a specific design, you should pin it down or trace it onto the 2 layers of fabric. 

 It's hard to see but there is a layer of tulle on this cotton.

With both layers, cut out your shape.  For the tutorial, I just did a heart to show that you can use this technique on rounded shapes.

Sew around the entire shape.  For a rounded shape you want to clip around the perimeter so that it will turn smoothly.


On the tulle side, you need to clip a small hole.  You use this hole to turn the piece.


Now you have a piece that is turned.  You need to press it to get a crisp, perfect edge.  Start with the iron on the lowest setting and before it really even starts to heat up, press the edges down.  The tulle can melt, so you want a barely hot iron when you start.  Once the edges are pressed down, flip the piece over, turn up the iron and really press the whole piece.


Now you have a lightweight applique that you can straight stitch down onto the piece.  This is great for stretch fabric, like onesies, t-shirts, etc. that stretch when you try to use a satin stitch.  It is also nice for lightweight and delicate fabrics that might rip or fray from a satin stitch. 

Here are some great tutorials from Cut Out and Keep!


Happy Sewing!


Sunday, September 19, 2010

My Newest Paper Bag Album + Layouts

By now, everyone knows that I am crazy about sewing, but what you may not know is that I have an equally sick obsession with scrapbooking.  I especially love mini albums.  My favorite by far are paper bag albums.  I have about 200 of these things made up and sitting in tupperware at my house.  Lisa & I just love getting together and making them.  I was try to stockpile them for some Christmas craft shows, but we really haven't even booked any shows for this fall.  I put a few in our Etsy Shop but for the most part they are just sitting around here.  Sometime I like to make one that it over the top fabulous.  I'll probably start giving a new mini album layout every Sunday on our blog, just because I love them so much.  These are really awesome and affordable Christmas gifts, especially for people you work with.  I even put one in the mailbox every Christmas for Gretchen - our mail carrier. 

I came up with this Sweet 16 Album because I wanted to get out my Cricut and actually get some use out of it and because I had this wonderful stack of paper I have been dying to use. 

The basics of making a paper bag album are pretty simple, you sew a couple of bag together.  I like to make 8 page albums (sewing 2 bags together), but some people make the albums huge. I've seen them with 30+ pages.  You can only sew 3-4 bags together without breaking your sewing machine needle.  IF you want to go bigger than that, you should use rings or just tie it together with ribbon.  I've said it before, you need to buy a 2 hole punch.  It will punch through anything. 

Then, you can stitch down the papers or stick them down with tape.  I've done it both ways.  Tape is easier.  For the cover I used my Cricut to cut out the title with a shadow and the mats.  It's the cartridge that comes with the machine.  Under the mat, cover paper, I put a huge piece and tulle and then tied it in a bow with a charm.        

For the next layout, I added more mats from the cricut and some of the scrollwork from the Home Decor cartridge.  I also taped down a little remnant of beaded trim I had in the stash.
For decoration I've got some primas with buttons in the center.  For the tag, I folded a foil flower in half, stapled it down, and then added a sticky gem.  I inked the tag with pink. 

This album is 6x6.  These are the huge bags you get at CVS or Meijer.  The dollar store only has the smaller bags that make a 4.5x5 album (which I normally make).  For this layout, I cut a circle page in 4 pieces and used 2 to make pockets.  I used some felt sticker details, metal words, and more primas.  Inside I have pull out pages for more photos.  I stapled folded primas onto them as tabs and then I used some glitter decals.  Lisa made some donations for Colorblok for a charity event and they gave us a ton of freebies.  They are right down the street from us and I love to buy from them. 

On this page I did a triple mat for each of the photo layouts.  The tags are embellished with more primas and scrollwork from the Home Dec cartridge.  I tied a big bow to hold the tags in. 
On the back, I have a bunch of layered flowers.  I jazzed them up by adding some flower shapes I made out of tulle.  These flowers are really expensive, so I try to add tulle when layering to make them go further. 

Here, you can see my pull out pages that were tucked into the pockets on the bags. 

Happy Crafting!

Saturday, September 18, 2010

Saving Art

My 3-year-old daughter has repeated her personal affirmation so many times lately.  Truthfully, I don't know where she comes up with this stuff.  But, I love her motto. 

"I am going to be an artist.  If I can't be a good one, I'll be a bad one."

Up until about a week ago, all of her art looked pretty much like this.  She would present me with a drawing and proclaim, it a rocket ship, or a princess, or a garden. 

Last week she brought me this drawing and said it was an ocean full of animals. 

They actually look like something.  I guess she had a breakthrough. 

Her latest art project from her first day of preschool:

It actually inspired me to start scanning her artwork into the computer to make a photo book for her.  I am going to keep all of the projects, photographing the 3-d versions and mix in some photos from this year.  At the end of 2010 I am going spend a few hours and make a digital scrapbook on snapfish for this year. 

Happy Crafting!

Sarah

Friday, September 17, 2010

How to Clean Your Iron

The previous post reminded me of a little trick I would like to share.  If you do melt something onto your iron, like felt or plastic (which, sad to say, happens to me all of the time), you can clean it off really easily.  Turn your iron onto the highest setting and let it really heat up.  Once it is really hot, take a few sheets of dryer sheet (I keep a cheap box of dollar store dryer sheets with my iron.).  Wad the sheets up into a ball and scrub your iron with them.  Be careful not to burn yourself, obviously, but this will remove all of the junk from your iron.  It's actually a good idea to clean your iron on a regular basis. In the grand scheme of things, not much can go wrong with your iron.  Make sure to use distilled water in the steam chamber and keep the plate clean and it should last a very long time. 

Free Tutorial Fridays - No Sew Pumpkin Halloween Costume

As promised, I am going to give you the tutorial to make this great Halloween costume.  A little background:

I made this entire costume for less than $5.00 (actually it was $1.00 plus some stuff I had in the craft room).  This costume would be totally cute for an adult, especially as a maternity costume or just to wear to your child's class part of for passing out candy.  You can get everything to make the pumpkin and hat at the dollar store.  My dollar store always has t-shirts and I lucked out this time they were actually from the Disney Store.  If you cannot get a shirt at the dollar store, check Michael's and Joann's.  They almost always have craft shirts on sale 2 for $5.  You could also make this long sleeve.  I was thinking of layering it over a green sweatsuit.  If you bought a man sized shirt you could even make this into a little pumpkin dress for an adult.  You can make this entire shirt and hat no-sew with hot glue, fabric glue, or fusible web.  One note, if you use craft fuse, felt will melt onto your iron.  Use a sheet of white paper as a "pressing cloth".    


See Pumpkin Halloween Costume No Sew Simple and 1000's of others - or share your own on Cut Out + Keep

I posted it on one of my new favorite sites www.cutoutandkeep.net.  Click the link above to get my step-by-step tutorial and you can make this costume in under 20 minutes. 

Happy Sewing!

Thursday, September 16, 2010

Free Fabric Flower Tutorial, Tips, and Tricks

I just thought that I would share this super easy craft Lisa and I make for our shows.  If you do shows, you need to have some smaller, lower priced item that people can pick up as little gifts or stocking stuffers.  You could make these patriotic, Halloween, Christmas, Easter, etc.  This would also make a really great birthday party favor.


I read online that you could cut felt with the cricut if you fused down stabilizer to the back.  Maybe you can with the Expression, but I only have the little Cricut Personal.  It was really a disaster.  It didn't work and I wasted $30.00 on the deep blade housing. 
Plus, I had a couple of yards of felt with fusible stabilizer on the back.  So, instead of giving up hope, I decided to try by die cutter.  Guess what?  It works like a charm. 

I used the Sizzix "Flower Layers 3" Die found here  (I actually buy them in Michael's or Joanns with a coupon). 

I also used the original "Flower Layers" shown below.  I was just on the Sizzix website and they have about 50 different flower dies to choose from.  There are a couple that look like poinsettias which would be so pretty for Christmas.
I don't actually have the Sizzix machine.  I have the small Cricut Die Cutter.  The Sizzix dies work in it. 

I just cut the felt down into 4"x6" pieces. 

Then I placed 2 layers of felt over the die and cranked it through the machine.

You do not need to put stabilizer.  You can use regular or stiffened felt. 

Then, I layered up the flowers in random order.  For the centers, I used a pompom.  You can get a bag of these at most Dollar Stores.  I stitched right through the pompom, wrapped the thread around the pony tail holder (also from the Dollar Store) and then come out the top of the pompom.  Then I tied the thread and left it sticking out. 

I used that string thread that you use for fillet crochet and a big upholstery needle.

These little flowers are about $.05-$.10 a piece to make. 

You could also attach these flowers to pins, hats, headbands, alligator clips, etc. 

Idea 2

Another great project Lisa and I did with felt and die cuts is to make felt dress up dolls for a felt board.  If you have never seen a felt board, the name basically implies what it is.  It is some felt glued onto a board.  The easiest way to make one if to take a piece of foam core board and spray glue down a large piece of felt to cover the board or the glue a piece of felt onto one of those little cork boards you get at the dollar store. 

Anyway little kids love these boards because the pieces of felt stick together and they can make pictures and tell stories. 


In addition to cutting out the basic shapes with my shapes dies, we also used the "Dress Ups" line to cute out people.  The body actually makes a boy or a girl depending on what hair you cut out.  They also have clothing dies.  This ended up being a very fun project and it only took a few minutes.  With my daughter in preschool, I will probably be using this project idea to make b-day gifts in a very affordable way. 

The Sizzix dies also come in animals, letter, and pretty much anything else you can imagine. 

Craft Roundup - Recycled Record Projects

I was inspired by posting my recycled record project to create this little roundup of recycled record tutorials. 


This photo frame is such a wonderful project.  With everything I have made out of old records, a picture frame never occurred to me.  Click here for the free tutorial on recycled record photo frame from Inspirational Tips, Techniques, and Tutorials.


This project is so simple with the use of the ring to bind everything together.  This idea would be really fun shrunk down to a small, 3"x5" size for a purse notepad. 
Here is the Tata et Moi 
from Cut Out and Keep's


I have already made 4 or 5 record clocks.  I just bought the clock kit and used the clock.  But, I liked they way she covered this with fabric.  You could make this for a child's room, kitchen, etc.

From Sew Many Ways

I know lots of people make purses from the records.  I have made a few, but I will say that the records always end up breaking.  I must just be way to hard on purses. 

Have fun with your old records and

HAPPY CRAFTING!


Working with Cork Fabric

So, I am not an expert in this - based on using it for one project.  However, I did a lot of research before buying it and watched quite a f...