Showing posts with label easy. Show all posts

Friday, June 3, 2011

Quick and Easy Summer Tube Top Tutorial

While browsing the internet for a quick project to do over the weekend, I stumbled across this super easy and cute tube top tutorial over at Craft Jr. Best of all, you only need elastic and regular thread and some fabric! No pattern needed; just use her measurement guide.


This is a really nice, easy to follow tutorial. And would make for a quick gift idea or last minute vacation bonus!! She also mentioned that her teen daughter has sewn up several of them. So if you have a teen who will need some easy entertainment this summer... keep this tutorial in your back pocket:)

Friday, October 29, 2010

10 Tutorials for Handmade Preschool Christmas Gifts

Memory Game

Can you say charm packs?  How great is this idea.  I know a few little people who will be getting this this year.  What a great idea.  I have always hated the paper memory games.  The pieces and small and always get lost or swept into the trash.

This tutorial is from fishsticksandfries.  Great Idea!


Car Caddy
This tutorial from handmade by jill takes a pages from the oh-so-popular crayon rolls.

This is a great idea for anytime of the year, especially little birthday parties.  Perfect for eating out entertainment. 

Felt Food Christmas Cookies

I have used this same idea for little Easter and Valentine's Day gifts.  Plus, this is a great idea for letter learning.  You could make the "cookies" in the shape of letters.  Whip up a couple of these sets for all of the little preschool friends.  It is cheap and easy.  It you don't sew, you could easily fuse or glue this together with great results. 

Elf Slippers


If you don' t think that you can make your own pattern, Lisa & I have several super easy slipper and booties patterns in the shop. 

Soft Doll Monster

I think that kids love stuffed animals in equal proportion to how much mom's despise them.  Maybe it's just me, but they have a way of taking over a room.  Yet, somehow, my kid and every kid I have ever know has in insatiable thirst for stuffed dolls.  This great tutorial is for a plush monster doll.  I'm thinking DVD + Doll = great gift for niece/nephew


Also, we have many soft doll and monster patterns in the shop for $2.95 this holiday season. 


Dress Up Tutorial
This is a nice tutorial for a simple and easy to make cape.  I don't know any kid who doesn't like dress up clothes, boy or girl.  As I am totally lazy, I would make this cape from felt or fleece and applique an initial or something for personal onto the back. 


This tutorial and more can be found at Yours 'til Niagra Falls.


Crayon Roll Tutorial

Skip to my lou has this great tutorial for making your own crayon rolls.


Felt Board Tutorial

This is a nice tutorial for making a felt board with a picture frame.  Lisa & I did a previous post so look in the archives about creating felt board pieces with your die cutter machine.


Felt Play House

This isn't really a tutorial, but you seriously should not need a tutorial to create this. 

There are so many options with these little card table play houses.  I also want to say for the record that 4 years ago, before these things became all of the rage in the crafting world, I made basically the same exact thing for my niece.  Instead of making something that goes over a card table, I made it on a hula hoop and hung it from the ceiling. 

Zhu Zhu Pet Clothes
Yes, I actually am serious.  Kamille has been asking for these since her b-day, when she got 4 pets. 


 This is a simple and fast project that can use up loads of little scraps.  Plus, if you are going to a birthday and gifting one of these little things, the kid will be thrilled to get some clothes to go along with. 

Girls in White Dresses did this tutorial.


Happy Crafting!


Wednesday, October 27, 2010

DIY Break & Bake Cookie Dough Tutorial

I love making cookies with Kamille, but I always seem to be throwing away most of a batch of uneaten cookies.  So, I decided to try making my own break and bake style cookies so that I could have the convenience of refrigerated cookie dough, but have all natural ingredients.

I started with my favorite cookie recipe.  I usually just use the recipe off of the nestle morsels (then I substitute whole wheat flour and flax seed meal for the white flour).  Plus, I like to make without eggs, so I substitute milk for the eggs.  It makes a chewy, delicious cookie.

Once I finished making my batter, I refrigerated it for 2 hours, until the dough was really stiff.


Next, I lined a small pan - I think that it is about 5"x5" with wax paper. 


Then I filled the pan about 1" deep with cookie dough.  I pressed it flat. 


Next, I cut it into sections, cutting about 1/2 way through the dough.


Finally, I wrapped the wax paper around the cookie dough, lifted the whole package out of the pan, and sealed it into an airtight gallon Ziploc freezer bag. 


You can keep cookies in the freezer for up to 3 months (the store bought kind last longer in the freezer and fridge because they are full of preservatives).  The dough will keep in the fridge for 3-5 days.

To use, you take them out of the freezer and let them defrost before baking. 


Tuesday, September 28, 2010

DIY Hair Bow Holder Tutorial

After sewing 6 dress up ponchos and making 2 new sewing patterns today, I was totally burned out on sewing.  I decided to look for an apple hair bow to make for Kamille's apple orchard field trip on Friday.  Looking through photos of hair bows inspired me to get moving on a project I have been wanting to do for a while - hair bow holders. 

I have about 5 tutorials/ideas here for making your own holders.  Call me crazy or just plain cheap but I almost had a heart attack when I saw that people were paying $10-$30 for these things.  I get it, the hand painted ones have some work involved (not as much as you think - I just painted an entire play kitchen in 2 hours).  But, seriously, this is a NO SEW - Hot glue project that is ideal for using up scraps you have around the house.  This one is really a freebie if you are a crafter because you probably have all of this stuff.  If not, you could get everything you need: glue gun, felt, appliques, flowers, ribbon, hot glue sticks, beads, etc. from the dollar store. So, even if you have to buy everything, you can make a fancy hair bow holder for less than $10 easily.  I think that these would be great birthday or Christmas gifts.  I might make a fancy one for each girl in preschool for Christmas.  

All of these were made with stuff I have lying around the house.  I also want you to keep in mind that you could make this with a LETTER INITIAL - They sell them already painting at Michael's, JoAnn's and Hobby Lobby - Plus a million other places.  I think I have seen them at Meijer.  So, you could just glue to ribbon onto that and have a personalized hair bow holder.


You could also use the little mini canvases.  I made a couple into photo frames with some scrapbook papers. 

mytatteredangels.com - one of my favorite blogs for mixed media/scrapbooking has this great little canvas just to give you an idea of what I am talking about, but you could just use one of the prepainted canvases - they are everywhere.  I know Target had little prepainted canvases that matched Kamille's comforter and I have seen them with initials and many other things.


But, you could really get into this project and make a beautiful canvas with a family photo and then glue the ribbons down from that. 

Upcycled CD 

For this project I made the standard round hair bow holder.  Instead of painting it, I used felt. 

I traced around a CD and the cut my felt out - 2 layers.

I cut a length of 2 types of ribbons. One is fatter than the other so I can layer them. 

I glued the double layer of ribbon down onto the back piece of felt.  I left a tail at the top about 1" so that I can put a nail in it to stick in on the wall.  Then I glued over the whole backing piece.


 I stuck the CD down onto the backing piece and then I glued to front piece of felt down.  This way I used up a useless old CD and made a stiff and perfectly round circle for my hair bow holder.


Now it's time to decorate.  I didn't feel like putting an initial down so I just ironed on a glitter heart applique I had.  If you wanted an initial, you can buy many different premade varieties or you can just print out the size and style of letter you want to a word processing program and use it as a pattern piece to cut out the monogram out of fabric. 

Then I glued down a big bow.  I am going to tell you how to make corker ribbon now.  It's so easy (but you could just buy a fancy bow at the dollar store)


Take the ribbon you want to use and clip it onto a small dowel.  You can get a 20 pack for a couple of bucks at the craft store in the wood section.  You can use binder clips of clothes pins.  It doesn't matter.  Twist it around in a spiral.  Bake this in the oven on a cookie sheet (I cover mine in fresh foil just in case there is any residue on it) at 200 for 20 minutes.  Once the pieces are cool, unwind it.  The ribbon will stay twisted up.  Secret revealed.
Then I just tie a few short pieces of the corker ribbon onto a bow.  Seal the ends of the ribbon with a lighter to keep them from fraying. 


This isn't the best photo, but I also glued a small bow at the bottom.  It took me about 10 minutes (the bows were already made and sitting around here).

Premade Wooden Bow Holder
 
I also have a bunch of prepainted wooden dodads lying around.  They are like $1.00 already painted at the craft store. 

I basically did the same thing. 
I took the painted wooden bird and glued a bow onto her head.  Then I glued my ribbons onto the back and put a bow on the bottom. 

I added some buttons to make it a little cuter. 

Photo Frame Bow Holder
This is a little 4x6 frame that would work well holding baby bows or little barrettes.  I would use a bigger frame for bigger girls.  I had this one lying around.  I actually saw a really beautiful one that used a really ornate frame and I might make something similar for Kamille dress-up area. 

I started out with a frame and removed the glass and cardboard.  I put it face down on some fleece (because I have it and I am out of batting).  I used 2 layers to give it some fluff. 
Then, I glued the fleece onto the frame base.  See how I cut it a little smaller that the back of the frame.  If you don't it will be too bulky and it won't fit back into the frame. 

Next, I took a piece of fabric (if you are making this for a baby - use one of the receiving blankets you got.  I had sooo many that just went unused.)


 I glued it on to the back gift wrap style. 


Then I cut a few pieces of ribbon (rick rack would have been cuter, but I'm out).  And tacked those down on the back of the frame backing.  This is where you clip the bows so you don't want to glued onto the front, only the back. 


Then I shoved the whole thing back into the frame.  It took a while to get it in there because of the bulk, but I did.  I glued a bow onto the top just to give it a girly touch. 

TUTU HAIR BOW HOLDER
Everyone has seen this one.  It is actually really easy to make and there are so many things that you can do.  It would have been super cute with some flowers added onto it, but it is getting late and my enthusiasm is waning. 
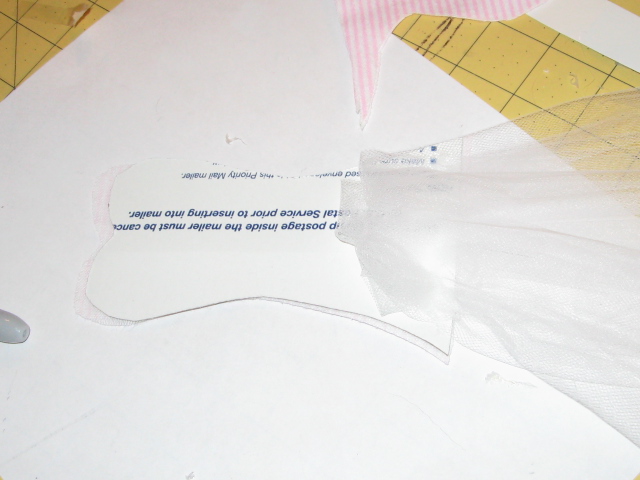
I freehand sketched out the shape of the bodice onto a piece of cardboard (it's a mailing envelope I am recycling because I get about 10 of these a week in the mail from clients.  I hate throwing them out.)

 I cut it and 2 layers of fabric out at the same time.  Then, I glued one of the pieces of fabric down as the backing. 


 I used tulle by the spool (it's a buck) to cut several lengths of tulle for the tutu skirt. 
 I folded the tulle in half lengthwise and then glued it down onto the cardboard.  On top of that I glued a few strips of ribbon for more decoration.

Then, I glued down the front piece of fabric over the whole thing.  I pushed it down to have less bulk where the tulle is.  I glued down some trims to make it more decorative.  You could also use bows, flowers, gems, etc.  I glued a handle onto the back with a little loop of ribbon

 Now the bows can clip onto the ribbons and you have a cute tutu style holder. 


HAPPY CRAFTING!

Wednesday, September 22, 2010

B is for Bias Tape: Ideas, TIps, and Tricks

What is bias tape?

For a beginning sewing bias tape can be very intimidating.  In fact, I have been sewing since I was 4 and I just started using bias tape about 2 years ago.  I used to have my mom come over and put the bias tape on any project I needed it for.  Then, one day she wasn't around and I had to do it myself.  It actually is much easier to work with than you might think. 

In technical terms, Bias tape or bias binding is a narrow strip of fabric, cut on the bias (UK cross-grain). The strip's fibers, being at 45 degrees to the length of the strip, makes it stretchier as well as more fluid and more drapeable compared to a strip that is cut on grain. Many strips can be pieced together into a long "tape". The tape's width varies from about 1/2" to about 3" depending on applications. Bias tape is used in making piping, binding seams, finishing raw edges, etc.

Commercially available bias tape is available as a simple bias tape, single-fold bias tape, and double-fold bias tape. Single-fold bias tape is bias tape that is folded in half lengthwise on its center line, wrong side together, and pressed. Double-fold bias tape is single-fold bias tape where each half is again folded in half lengthwise, wrong sides together, and pressed.  - http://www.apparelsearch.com/definitions/miscellaneous/bias_tape.htm


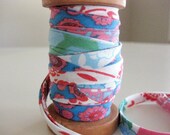
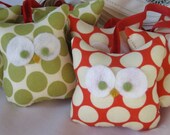
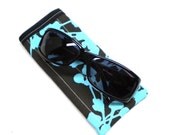
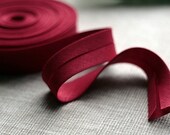
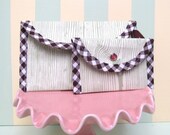
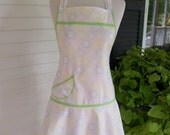
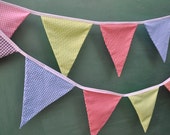
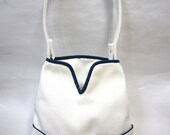
What can you do with bias tape?  I created this etsy treasury to show that many kinds of bias tape available and some of the creative projects people are making with bias tape.

'B is for Bias Tape' by c1h8r9is


granny bag sewing p...

$7.50
Vintage Notions Ban...

$12.50
Bumble Bee Dolly an...

$20.00
Kimberly Royal Bias...

$2.75
Christmas Owl Banne...

$60.00
Sunglass Case / In ...

$5.00
Linen bias tape -- ...

$7.50
Sweet and Simple PO...

$4.00
Trendy Flared Full ...

$26.95
Fabric Bunting - Pa...

$19.00
Handbag Like A Whit...

$118.00
Out of this world l...

$7.00
The Wright Rainbow ...

$8.00
Orange Flowers Chec...

$7.00
BUBBLEGUM PINK GING...

$8.40


Lisa and I also have a few patterns that use bias tape.  One of my favorites is the rumba ruffled diaper cover. 


We used bias tape to make an easy elastic casing for the diaper cover. 

Here is a great tutorial on applying bias tape from sewneau.com:


Click here to find the step-by-step guide to applying bias tape and many other great tips and tricks.

Another great tutorial on applying bias tape is provided by Wrights - one of the leading commercial manufacturers of bias tape.


Click here to take a look at their free bias tape tutorial.

Working with Cork Fabric

So, I am not an expert in this - based on using it for one project.  However, I did a lot of research before buying it and watched quite a f...