Sunday, January 23, 2011

Wooden Fairy House Tutorial

I was sooooo busy at Christmas that I didn't have time to get all of my projects photographed and blogged.  This is a cute little fairy house that I put together for Kamille.  I am getting so tired of plastic junk that breaks and has a ton of tiny pieces that immediately get lost.  She was desperate for the Pixie Hollow magical fairy house.  She already has a fairy jewelry box/house that she never plays with.  I loved this build a tree house kit, but it is +$130.  The pieces make a house that is about 22" tall. 
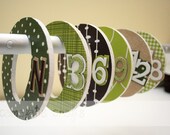
For my smaller version that is about 12" tall, I used 3 wood clock faces from Michael's.  They are in with all of the wood burning and other wood things.  I actually wanted to make 1 more tier with a huge wood slice, but they didn't have any.  I also planned on using branches instead of a dowel, but it just got too cold and snowed before I could go out into the yard and cut some.  So, I just used a dowel to make the supports.  I screwed them into the wood slices after pre-drilling the holes.  The whole project could use a few coats of sealant, but I need to wait for slightly warmer weather to seal it. 

 I also made a coffee table and a little felt leaf couch for the house.  Kamille got a bunch of little princesses that came with furniture, so she is also using that in her house. 

I made this little rug out of felt. 

 Here you can see the leaf hammock bed and the tiny blanket and pillow I made from felt.  I just hot glued the hammock onto the posts. 


One additional element you cannot see is the little ladder that the fairies can climb to get from one level to the next.  Kamille has been playing with this little house everyday.  It seems much sturdier than the plastic cottage.  Plus, there is some room for imagination.  It doesn't talk or light up or sing.  It is 100% powered by creative play.  Also, the project was more in the range of $30.00, rather than $130.  It may not be as fancy, but it also doesn't take up half of her room.


Saturday, January 22, 2011

Need Ideas for a Preschool Valentine's Day Party?

Some craft projects

Popsicle stick bug

paper plate valentine holder

Snacks
Bell Peppers and dip


Rice crispy treats
Games

Mend Broken Hearts

For this preschool Valentine’s Day activity, cut several large hearts out of construction paper. Then, cut the hearts in half using a different cutting pattern on each heart to make them look like broken hearts. Mix the cards up and have your child try to mend the broken hearts by matching the two sides together. You can also play this with older kids by writing a message across the heart and then playing it with a large group. Each child gets one half of a heart and must find his or her match.

I Love You Because

Preschoolers are sweet, so set a timer to three minutes and have your child say what they love the most. You can also have them say things like, "I love my daddy because," or "I love my brother because." See how many nice things they can say about their loved ones.
 
Pin the heart on Cupid
On a large piece of poster board, draw a flying Cupid with his arrow. Or buy a cut out Cupid and glue it to the poster board. Cut out a small red heart. Stick a piece of tacky tack on the back of the heart. Each child takes a turn being blindfolded and pinning the heart on Cupid's arrow.


Need a Helping Hand Getting Organized?

'Get Organized for the New Year' by madaboutscraps

I decided to take a little break from organizing my daughter's room (5 hours in so far) to put together this treasury of organizational items. Getting more organized is always on my to do list. Check out the post on our blog www.boutiqueit.blogspot.com and follow us for a free sewing pattern.

Organized People Ar...

$12.95
GOTCHA GRANDE ... P...

$44.00
Set of 3 Jewelry / ...

$35.00
New Listing - White...

$84.00
Set of 20 Square Ma...

$44.00
Buy 2 Get 1 Free S...

$6.00
Purse organizer wit...

$29.95
Closet Dividers

$20.00
Raw Material Log - ...

$4.00
Apothecary Cabinet

$60.00
Car Seat Organizer ...

$6.50
PAPA'S OLD AMER...

$35.00
Vintage Floral Addr...

$35.00
Owl Friends Peg Rac...

$79.00
Create your own Lar...

$24.00
Inspire Me - Shabby...

$84.99
Treasury tool is sponsored by Lazzia.com.

Teacup Piggy Project

This year all Kamille wanted for Christmas were 2 teacup pigs, which she was calling purse pigs.  So, I tracked them down and they were actually pretty affordable - $12.99 for the pig and it's plastic teacup.  I wanted them to be a gift from the man in red, so I needed them to have a bit more pop than just presenting naked pigs under the tree. 

Last year we did a post on upcycled dog toys.  One of the items was from a blogger who took an old suitcase and turned it into a small dog bed.  I don't have a small dog, but I still had that project in my mind because it was so cute.  So, I decided to take this old rummage sale find - a hairdryer case - $2.00 and turn it into a little bed for the piggies. 
 This project wasn't hard and had a lot of give because all of the trim covers up an little mistakes you may make.  However, it took several hours.  First, I used hot glue to put a layer of fleece on the outside of the case, top and bottom.  I wanted it to look upholstered.  Once I had the fleece on there, I trimmed away the excess.  Next, I added the fabric with more hot glue.  It is a slow process to smooth out the fabric and get it looking just right.  Use HIGH temp glue for the best results.  I then trimmed away the extra fabric.  Then I used ribbons to form a decorative band around the edges and to cover the fabric.  I also glued some trim onto the handle strap to jazz it up. 
 
 After that, I used the same ribbon trim to make some "hinges" that would hold the case open.  I added the self-sticking hooks to hold extra clothes (which are mia somewhere in Kamille's room right now) and accessories.  Finally, I filled the bottom with stuffing and then glued in the leopard fabric to make the bed.  I left enough room that she can close the case with both pigs inside and carry it around or store it.   
  I also made some outfits for the pigs.  They sell outfits that retail for about $10.00 - which is crazy.  Plus, the outfits have arms and legs.  No 3-year-old is getting the arms and legs of one of these little pigs through the sleeves of some tiny outfit.  I based my pattern on a dog coat.  It velcros under the neck and tummy.
 The final item I made was this little purse that holds both of the pigs. 

Glitter Scarf Tutorial

My niece and daughter are totally obsessed with glitter/sequin scarves.  Those things are expensive.  I personally have a hard time justifying spending $15-$18 on an accessory for a 3-yr-old or even a 7-year-old.  So, this Christmas, Lisa and I made up a bunch of the scarves at much more affordable prices.  I have a NO SEW and a LOW SEW version of the scarves below.  JoAnn and Walmart both sell a fabric they call confetti dot fabric.  It comes in about 10+ colors.  The fabric is about $6.00 a yard (but you can score it for much less with a coupon or buy purchasing a remnant).   

 Because this fabric does not run or fray to speak of, you can make a really cute scarf by just cutting an 8" strip.  If you cut anything narrower, it tends to roll (which makes a nice scarf for American Girl Doll).
I also made a doubled version by cutting 2 8" strips and stitching them together.  I left the ends open for turning. 

These scarves a played with/worn around here everyday.  The single scarf is about $1.00 and the double scarf is about $2.00 (when you buy the fabric with a coupon).

I made the no sew scarves a couple of years ago as party favors for my niece's glamour makeover birthday party.  They were a hit. 

Friday, January 21, 2011

Portrait Props

This is a great little selection of photo/portrait props from one of my fellow preschool moms, Beth.  You can click any of the photos to go to her etsy shop, monkeyknots.    


READY TO SHIP- Double Felt F...

$8.00
Neckties from Monkey Knots

$18.95
NEW ITEM- Crochet Kufi Hat w...

$12.95
Monkey Knots Neckties- Strip...

$17.95
Treasury tool is sponsored by Lazzia.com.


Here are a few of our patterns for some additional portrait props. 


Wednesday, January 19, 2011

Free Receiving Blanket Tutorial for Konbit Sante Craft Hope

This morning I put together this tutorial on making a basic receiving blanket.  No Serger Required. 

This tutorial will make a blanket sized for swaddling.  Most receiving blankets you buy from the store are sized 30"x30" which is not ideal for swaddling. 

  You start with a 34"x36" piece of flannel.  I cut it with the rotary to make sure that it was perfect. 
Next you can serge the edges or you can use an overcast zigzag stitch.  To make an overcast zigzag, you need to set your machine to the widest zigzag setting.  I keep the stitch length short.  You should line the fabric up in the middle of the foot.  In the right position, the needle will not catch your fabric. 
 In the left position of the zigzag stitch, the needle will enter the fabric.  This overcast zigzag will encase the raw edge to prevent fraying in the wash.
Stitch around the entire blanket.  It might cause the fabric to wave, so you will want to press the blanket when you are finished. 
Finally, I added a little double heart applique by ironing some craft fuse onto cotton and then fusing it to the blanket. 

Working with Cork Fabric

So, I am not an expert in this - based on using it for one project.  However, I did a lot of research before buying it and watched quite a f...