Well, after finding my newest make up brush ruined in the bathtub (apparantly it was part of a barbie makeup salon that took place in this morning bath) I decided that it was high time to make myself a new make up bag instead of just throwing everything loose into a drawer in the bathroom.
Well, after searching around for some makeup bag tutorials, I was really disappointed. They are basically glorified pencil cases and offer little actual organization - I wish I still had my old caboodle!
Then, I found a very simple concept - the make up roll. It's really similar to the knitting needle roll, but for your make up and brushes.
You can find the tutorial here at LBG Studios. I liked the basic idea of this and with this really simple design you could seriously just fold a really nice single placemat and create this same concept without measuring or really much work at all.
I wanted something a little more complex so I changed her original design up a bit. I added pockets to store eye shadow, blush, etc. and a flap the keep everything from slipping out of the top. The middle pocket is for the brushes and I made one of the parts a little wider to hold a mascara.
Then, I didn't really care fo the plain exterior so I jazzed it up with some ribbon roses. I actually picked these scraps up off of the floor next to the cutting table to turn them into these roses.
I'm sure that we previously posted a tutorial for these roses on the blog, but if not, here is another great tutorial that shows you how to make srap fabric roses from SippyCupMom.
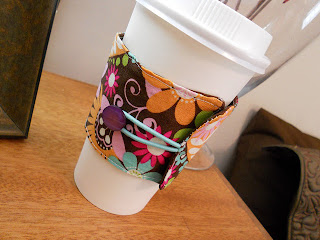
Finally, I am not into the ribbon tie closure. In my experience, they just come untied or turn into an impossible to untie knot. So, I loved this idea for a closure that I saw in this great coffee sleeve tutorial from Liberate Creativity.
See how there is elastic cord (I think that this is actually a hair rubberband which is genious because then you can get the cord to be any color you want.)
So, here you can see that I used the same type of closure on my make up roll, a button with elastic cord so that the roll can easily expand at I add more make up.
Now you see why I call it CRAFT FUSION. I used the pieces from three totally unrelated tutorials to make one great project. .
Subscribe to:
Post Comments (Atom)
Working with Cork Fabric
So, I am not an expert in this - based on using it for one project. However, I did a lot of research before buying it and watched quite a f...

-
I've made quite a few baby doll slings in the past and I also have a really great pattern in my craftsy shop for a cotton baby doll sli...
-
Proof positive that I have a sickness when it comes to crafts is my newest project for the day. I just spent almost two hours making this t...
-
Sewing Hack I love to use serger thread for many of my projects. Let's face it, serger thread is cheap. The giant spool is $2.00. ...


No comments:
Post a Comment