Showing posts with label sewing. Show all posts

Monday, September 26, 2011

Fall Jacket Tutorial

Friday was the first official day of autumn! Which just so happens to be my personal favorite season. The air gets colder bringing lots of new scents and sounds. It also brings to me a strong desire to cook and sew! Ahhh.... staying in and getting back to being crafting.
I LOVE FALL!!!!

So get your little one ready for some colder weather with our sweet instant download


After you sew up this sweet and easy jacket, try your hand at some homemade graham crackers.
Smitten Kitchen has an awesome and easy recipe for you guys to try.
Don't they look yummy?!?!?!


You can find the full recipe with some beautiful pics here.
HAPPY FALL!!!

Friday, June 3, 2011

Quick and Easy Summer Tube Top Tutorial

While browsing the internet for a quick project to do over the weekend, I stumbled across this super easy and cute tube top tutorial over at Craft Jr. Best of all, you only need elastic and regular thread and some fabric! No pattern needed; just use her measurement guide.


This is a really nice, easy to follow tutorial. And would make for a quick gift idea or last minute vacation bonus!! She also mentioned that her teen daughter has sewn up several of them. So if you have a teen who will need some easy entertainment this summer... keep this tutorial in your back pocket:)

Wednesday, February 9, 2011

Konbit Sante Receiving Blankets

Lisa and I finally finished up the 30 tote bags and 30 receiving blankets for Sunday's party to benefit Craft Hope Project 11, Konbit Sante. 

Now I just need to make 30 tiny stuffed animals and we should be all set for Sunday.
By the way, if you missed it, the free tutorial for making receiving blankets in posted on our blog.  They make a really great baby shower gift. 

Tuesday, February 1, 2011

Valentines Wall Hanging

A while back I had ordered a charm pack of Moda Valentine's day fabrics and had intended to make place mats out of it. However, I was in the mood for something new and Valentine's related to add some color to our living room. And this is what I ended up with after just and hour or so.

I took some left over yardage of light blue felt from some Christmas ornaments that I had made and cut into two 24" x 24" squares. Then i made three different sized heart shaped templates out of scrap paper and proceeded to cut the largest and smallest hearts out of assorted pink and red felt. The middle heart is where the charm squares came into play. I actually cut the heart first making the biggest heart that I could out of 9 charm squares (mine where 5" squares). Then I made the template for the small and large square to my desired size.

Next, I simply stitched the charm square heart to the largest felt heart. And then the smallest felt heart on top of those two. Lastly, I stitched down the whole applique on the blue background with a satin stitch. I just eye balled everything as far as spacing went alternating pink and red appliques. 

When I had all of my hearts appliqued down on the back ground, I added three lengths of ribbon (folded in half to make tabs) evenly spaced at the top of the project and pointed inwards toward the bottom of the project.  Next, I placed the backing fabric (the other 24"x24" piece of felt) on top of the appliqued piece (right sides together). I stitched around all sides with a 1/4" seam allowance leaving a 3" opening for turning. Then I just simply turned the wall handing right side out and top stitched making sure to catch the 3" opening.

Voila!


A simple, easy, and inexpensive wall hanging was created. This would be a great way to use up all of your fabric scraps!

Happy Sewing!!

Saturday, January 22, 2011

Teacup Piggy Project

This year all Kamille wanted for Christmas were 2 teacup pigs, which she was calling purse pigs.  So, I tracked them down and they were actually pretty affordable - $12.99 for the pig and it's plastic teacup.  I wanted them to be a gift from the man in red, so I needed them to have a bit more pop than just presenting naked pigs under the tree. 

Last year we did a post on upcycled dog toys.  One of the items was from a blogger who took an old suitcase and turned it into a small dog bed.  I don't have a small dog, but I still had that project in my mind because it was so cute.  So, I decided to take this old rummage sale find - a hairdryer case - $2.00 and turn it into a little bed for the piggies. 
 This project wasn't hard and had a lot of give because all of the trim covers up an little mistakes you may make.  However, it took several hours.  First, I used hot glue to put a layer of fleece on the outside of the case, top and bottom.  I wanted it to look upholstered.  Once I had the fleece on there, I trimmed away the excess.  Next, I added the fabric with more hot glue.  It is a slow process to smooth out the fabric and get it looking just right.  Use HIGH temp glue for the best results.  I then trimmed away the extra fabric.  Then I used ribbons to form a decorative band around the edges and to cover the fabric.  I also glued some trim onto the handle strap to jazz it up. 
 
 After that, I used the same ribbon trim to make some "hinges" that would hold the case open.  I added the self-sticking hooks to hold extra clothes (which are mia somewhere in Kamille's room right now) and accessories.  Finally, I filled the bottom with stuffing and then glued in the leopard fabric to make the bed.  I left enough room that she can close the case with both pigs inside and carry it around or store it.   
  I also made some outfits for the pigs.  They sell outfits that retail for about $10.00 - which is crazy.  Plus, the outfits have arms and legs.  No 3-year-old is getting the arms and legs of one of these little pigs through the sleeves of some tiny outfit.  I based my pattern on a dog coat.  It velcros under the neck and tummy.
 The final item I made was this little purse that holds both of the pigs. 

Glitter Scarf Tutorial

My niece and daughter are totally obsessed with glitter/sequin scarves.  Those things are expensive.  I personally have a hard time justifying spending $15-$18 on an accessory for a 3-yr-old or even a 7-year-old.  So, this Christmas, Lisa and I made up a bunch of the scarves at much more affordable prices.  I have a NO SEW and a LOW SEW version of the scarves below.  JoAnn and Walmart both sell a fabric they call confetti dot fabric.  It comes in about 10+ colors.  The fabric is about $6.00 a yard (but you can score it for much less with a coupon or buy purchasing a remnant).   

 Because this fabric does not run or fray to speak of, you can make a really cute scarf by just cutting an 8" strip.  If you cut anything narrower, it tends to roll (which makes a nice scarf for American Girl Doll).
I also made a doubled version by cutting 2 8" strips and stitching them together.  I left the ends open for turning. 

These scarves a played with/worn around here everyday.  The single scarf is about $1.00 and the double scarf is about $2.00 (when you buy the fabric with a coupon).

I made the no sew scarves a couple of years ago as party favors for my niece's glamour makeover birthday party.  They were a hit. 

Tuesday, January 4, 2011

T- shirt shrug tutoral


See T Shirt Shrug and 1000's of others - or share your own on Cut Out + Keep

I love this simple tutorial where you can make an old t-shirt into a shrug.  This looks like a great way to remake a few of Kamille's old t-shirts into little spring jackets.

Sunday, January 2, 2011

Valentine's Day Handmade Gift Round Up

It's always good to have your ducks in a row when it comes to handmade holiday gifts.
If your like me you'll need the extra month to get some of these super great handmade Valentine's Day gift ideas done in time!

======================================================


This cute little wrapped paper chocolate bar from Stinkin' Cute Stuff would make an excellent Valentine's gift for anyone.  

=======================================================


I love this idea from Alpha Mom! You could could do these up as a surprise for your little ones or have them help and send them off you Grandma. What a fun way to use up all of that scrap paper!

====================================================


These are just too adorable! I think I might wear one;)
The Purl Bee provides a wonderful tutorial on how to make some of these Rose Barrettes!

======================================================


Who wouldn't love this yummy jar of cookies! Found this idea over at Squidoo.

=====================================================


Catching Fire Flies offers a bunch of really affordable and fun ways for the whole family to share on Valentine's Day.

======================================================


Catching Fire Flies also has a very easy tutorial on how to make this sweet recycled firefly! This one is too good to not share;)


I love that these little treat boxes feature special art work! These would make very thoughtful classroom treats to share! Check out inchmark for more great ideas!

======================================================


This is one of the cutest ideas yet!!! Stitch Craft gives an amazing tutorial on how to make these little tissue holders. What a great time of year for a gift like this!


=========================================================


Moda Bake Shop gives full measurements and directions on how to sew one of these Valentine's Penny Pockets! These would be cute holding your silverware for a romantic dinner!

===========================================================


Cake Journal does it again!
My mouth is watering looking a this cute paper cone filled with sugar cookies!

=================================================


This crocheted edging on About.com would make a very sweet trim on the bottom hem of a pair of jeans or a cotton dress!

=====================================================


Sew Mama Sew has a really easy tutorial on how to make one of these sewn valentines for someone special in your life!

=================================================

Happy Crafting!!


Saturday, January 1, 2011

Calendar Tutorial Roundup

I thought that it would be a fun idea for New Year's Day to put together this roundup of cute calendars you can make yourself. 

Nancy Morgan over at Paper Smiles made this adorable desk calendar tutorial.  I just love this.  This idea would really make a nice addition to your Christmas Cards.  You could even use a photo instead of the stamping.  For all of my sewers out there, you could use charm squares instead of the card stock for the accent papers.  How cute would that be.  By the way, you should really check out the Paper Smiles blog if you love papercrafting.   It is loaded with great ideas.


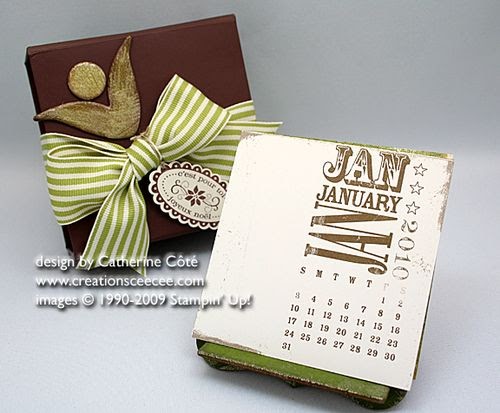
Catherine Cote at CeeCee's Creations made this great mini calendar tutorial.  Everyone knows how much I love minis.  This would really make a fun little project to tuck into stockings for next year or a great teacher gift.  Plus, I am seeing a scrap box project here that might help me get rid of all of those tiny scraps of card stock I am currently hoarding ;).   

Kelly over at AllThingsMadebyKelly made this totally fun little desk calender tutorial.  I especially love that she used recycled materials to create it. This would really be a fun teen project.  Just add some cheap stickers and they could really glam it up.  I'm also thinking that you could put a scrapbooked photo mat into to front of the cover so that it could be a little photo frame after the year is over. 


Angela Fehr from Scraps From My Table made up a tutorial for one of my personal favorite calendar projects, the cookie sheet calendar.  I have probably made about 20 of these.  None of them have looked as nice as hers and I made them a little differently (I used my xeron magnetic cartridge to make magnets). 
Naptime Crafts made this really sweet countdown calendar for Halloween.  I think that the same idea could be applied to any holiday or birthday.  Click here to check out the countdown calendar tutorial.

Wednesday, December 29, 2010

Some Fun Party Hats

New Year's always makes me think of party hats.  Plus, everyone who knows me knows I LOVE hats, esp mini hats.  So, here are some great party hats for many occassions.

This first set of hats is from Girl Inspired.  This is by far one of the cutest blogs I have come across.  Mostly owing to her great choices in fabrics. 

Kamille would die for these Olivia inspired party hats from SweetMintStudios.

This Cookie Monster hat from BabyBoydBlog is SOOO cute.


Some Fun Little Winter Sewing Tutorials

Ruffles and Stuff posted this totally cute sewing tutorial for a scarf applique t-shirt dress.  I would probably make a couple of changes - like maybe using some cute charm pack for the scarf and possibly doing the dress in a darker color t-shirt because Kamille trashes white within minutes.  But, it is so cute.  I will be making one. 

Happy Together put together this little scrunchy scarf sewing tutorial - it's more of a how to than a step-by-step photo tutorial of how to scrunch up scarves.  Basically, you stitch with elastic thread in the bobbin of your machine.  She used a straight stitch down the scarf, but when I did this before, I did a zigzag across the scarf.  Try different patterns to see what you like.  Anyway, this is a great project to remake scarves you may already have.  Another nice thing about this concept is that it really shortens the scarf.  So, you could take an adult scarf and make it shorter for a child. 


Look Ma, No Patterns came up with the great little tutorial on a simple muff pattern.  I do like a nice old school muff.  It is especially nice for holiday portraits.  Plus, these are very simple to sew.  She uses fleece, but you could easily sub faux fur or upcycle an old real fur coat you make have in the closet. 

Tuesday, December 28, 2010

Valentine's Day Coffee Sleeve Free Tutorials

Check out my newest tutorial over at Cut Out and Keep for this adorable coffee sleeve.


See Two Hearts Coffee Sleeve and 1000's of others - or share your own on Cut Out + Keep

Valentine's Day Felt Fortune Cookie Tutorial

I thought that these felt fortune cookies would make a great little Valentine's gift for your little one or as a substitute for cards or candy favors. 

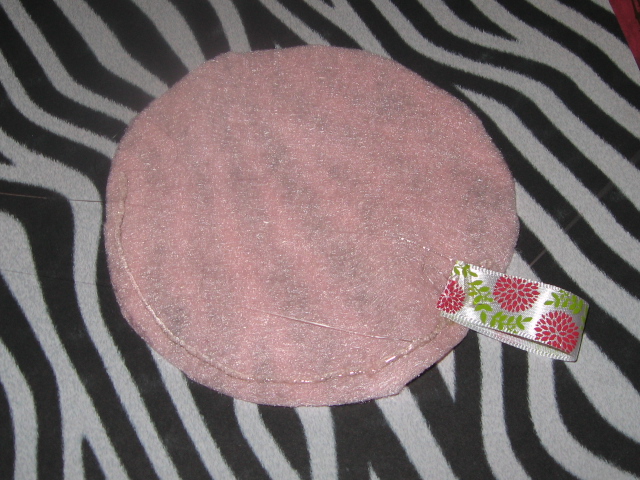
You need to 1st trace out your circle.  I used a CD and it may seem large, but it actually makes an ideal sized fortune cookie.  In the spirit of Valentine's Day I used pink felt, but brown is also cute.
 Cut out your circle.  A single layer works perfectly.  If you use a double layer of felt you will get a cookie with more body.

You have 2 options for the message.  If the cookies are just for fun as decorations or for a play kitchen, you may want to use cute ribbon as the tag.  White gros grain ribbon also works.  Cut about 2" of ribbon and fold it in 1/2.  Secure with hot glue or tack it with a stitch. 
 I hot glued this project together, just for the sake of time.  You can sew these by hand or with your machine as well.  I made these for my cat and filled them with catnip and those I machine sewed. 

Run a line of glue around 1/2 of the circle.  Make sure you have glue on top and on bottom of the ribbon tag.
 Fold the cookie in 1/2 and let it dry. 

The other option is to make a paper tag that the recipient can pull out.  In that case, you don't want to get glue where the hole for the tag needs to be.  See how I marked out the space around the tag.  You would glue where the dashed line is. 
 Then, you fold the cookie in 1/2 and let it dry. 
 Finally, you need to put a dot of glue in the center of the cookie and fold it.  You can either hold it until it dries or pin it closed with a clothespin. 

The tag will come in and out so you can write lots of notes to your little one for his/her lunchbox. 

Thursday, November 25, 2010

Zhu Zhu Pet Clothes


See Zhu Zhu Pet Clothes and 1000's of others - or share your own on Cut Out + Keep

I am well aware of how sick this project is, but what can I say?  This is on Kamille's want list for Christmas.  I actually just made about 3 dozen of these crazy little outfits for Belle, Maggie, and Kamille.  Zhu Zhu pets are an insane doorbuster at Toys'r'Us tonight - 3 for $10.  Everyone knows that I despise imported toys, but I have to give in on a few items on the Christmas wish list because Christmas is about spreading holiday cheer and magic, not forcing my kid to give up her Christmas wish list for my personal political beliefs about the trade deficit. 

You can check out my full tutorial for all of the clothes shown at Cut Out and Keep with the link above.  They are actually kind of fun to make because you can use up all of those little scraps of fabric and ribbon.  I might even pick up a couple pieces of the new Disney trims or some Christmas trim to make a few more outfits.  I also made a carrying case for the outfits to help them stay organized.  Maybe I'll post the pattern another day.

Happy Thanksgiving!

Sunday, November 14, 2010

Coffee Sleeves for Christmas

This little project was inspired by my sister.  She is all about embroidery, but as you all know, I totally despise hand sewing. I took here idea for a java jacket style coffee sleeve and made it modern with a retro graphic.  So my version is fleece because fleece is made of up to 100% recycled materials (old pop bottles).  It also has an insulating effect that keeps your coffee warm and your hand cool.
I basically traced around a cardboard coffee sleeve to make my pattern, adding a 1/4 inch seam allowance.  Then I cut 2.  Then, I printed my vintage style graphics on printable fabric.  I satin stitched it down (a very tight zigzag).  Then I sewed the two pieces right sides together, turned and then top stitched.  Top stitching gives the piece shape and closes the opening from turning so there is no need to do a blind stitch to close.  If you don't have a machine, you could hand sew this in about 10 minutes.  I am lazy, so I would whip stitch the whole thing or blanket stitch.  Fleece is not going to fray.  I added velcro to the back for closure.
I am going to do a line of photo sleeves next.  I can't wait to give out baby photo coffee sleeves to all of my friends.  

Java Jacket Coffee Sleeve Reusable
I also have a great way to turn this idea into a kid craft.  I made a white version on this in white cotton with a white fleece lining.  I had my daughter color the whole thing with crayons.  Then I ironed it on high with a sheet of wax paper over the top.  This sets the crayon.  What a fun gift for dad or grandma/grandpa. 
This project is another great way to use scraps.  I save every little piece of fabric from my projects, so I always have odd sized pieces waiting to be used.

So Simple Monster Softee Dolls For Christmas

I recently made about 30 of these kooky little dolls for my ebay store. I wanted a simple pattern that I could whip up really quickly and that had no hand sewing. I free hand drew a pattern out onto newspaper double. Since I wanted the front to be two colors, I chopped it in 1/2 and used the 2 halves as a template for cutting. Then, I sewed up the 2 front pieces and stiched them onto the back leaving the whole top of the head open. I stuffed the dolls and then top-stiched the head shut with a decorative embroidery stich. The mouths are trim and the eyes are felt that I zig-zagged down.

Friday, November 5, 2010

Christmas Gift Tutorial Roundup - Elementary Aged Children

Nintendo DS Cases

There probably isn't a hotter gift item for kids in this age group than the DS.  It is a must have.  So, whether you are crafting for a boy or a girl, a DS case would make a great gift. 

This drawstring case from Mariska is one of the simplest ideas for a case I have seen.  It makes me want to make a few for my upcoming craft shows.

Notice the little pocket in back for the games.  Check out the DS case tutorial here.


This is another great Nintendo DS case tutorial from Kender Crafts.  Plus, her blog is awesome.  I didn't see an idea on there I didn't like. 

I Spy Bags
This is also from Kender Crafts, but you can find the tutorials everywhere.

I Spy stuff is huge with this age group as well.  One word to the wise, Lisa & I tried these and I just could not a get a product that I wanted to sell, but for gift giving, they were fine.  The plastic pellets can be pricey, so bring a coupon.  Kamille plays with her monster I Spy bag every time she comes across it in her toys.  Find the I Spy Bag Tutorial here.

Tool Belt
This is a great tutorial because you could make it into so many things, a garden apron, art smock, etc.

Check it out over at Seven Little Monkeys.

Fabric House Tutorial
The reason I didn't call this a doll house is that with some fabric selection it can go boy or girl.  Try a safari/jungle look for zhu zhu pets or to keep all of those annoying little pop up pets in.


Lunch Bags
This is a cute pattern for a fun and fast lunch sack.  You can also check out my tutorial on the Busy Beaver Lunch Sack.


Tissue Holder


This is another cute little idea.  I doubt you need a tutorial to make it.  Add a loop to hand from the backpack. 

Back Pack Doo Dads
Now the Sesame Street kind might be too babyish for elementary, but this tutorial was TOO cute to pass by without sharing.

Check out the tutorial over at Craft Passion.
Headband Tutorial

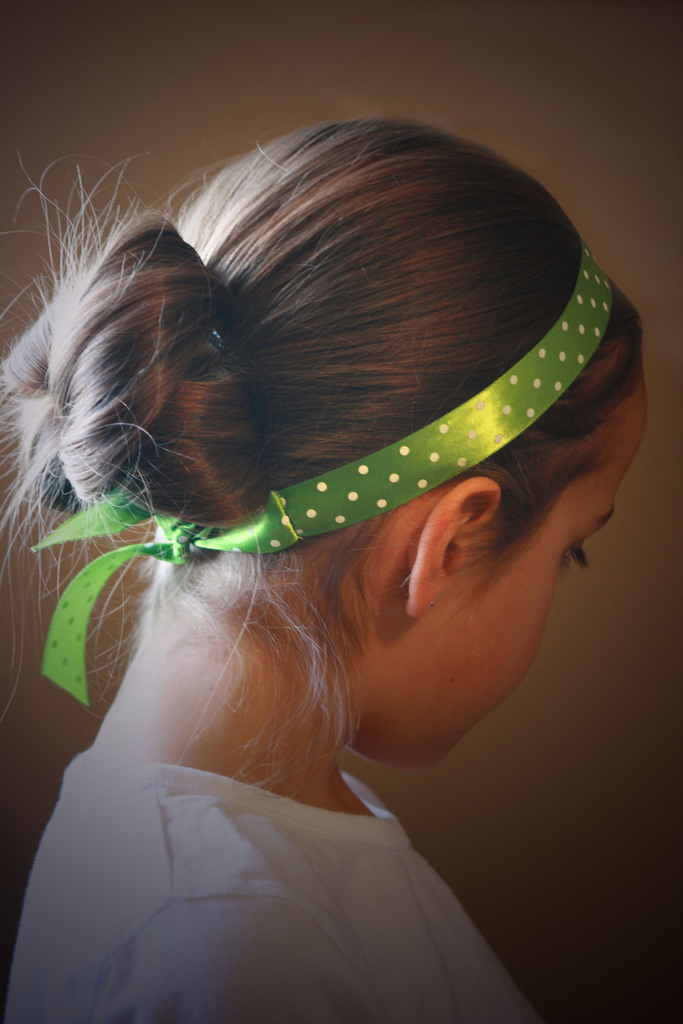
This ribbon headband tutorial seems too simple, but there is a great hint involved that is worth checking out. 

Tutorial from Chocolate on my Cranium.


Working with Cork Fabric

So, I am not an expert in this - based on using it for one project.  However, I did a lot of research before buying it and watched quite a f...