Showing posts with label recipe. Show all posts

Monday, September 26, 2011

Fall Jacket Tutorial

Friday was the first official day of autumn! Which just so happens to be my personal favorite season. The air gets colder bringing lots of new scents and sounds. It also brings to me a strong desire to cook and sew! Ahhh.... staying in and getting back to being crafting.
I LOVE FALL!!!!

So get your little one ready for some colder weather with our sweet instant download


After you sew up this sweet and easy jacket, try your hand at some homemade graham crackers.
Smitten Kitchen has an awesome and easy recipe for you guys to try.
Don't they look yummy?!?!?!


You can find the full recipe with some beautiful pics here.
HAPPY FALL!!!

Saturday, March 12, 2011

Pot of Gold Caramel Corn for St. Patrick's Day

It's official, I have now eaten about half of that cup of caramel corn while making this tutorial and I am now sick.  Dear caramel corn ... why do I love you soooooo much? 

This is a really great basic recipe for caramel corn.  I wanted to make a caramel corn that would work well with beer for St. Patrick's Day.  This caramel corn is loaded with nuts. 
You can check out the full tutorial over on Cut Out and Keep

See St. Patrick's Day Pot Of Gold Caramel Corn and 1000's of others - or share your own on Cut Out + Keep

Thursday, February 17, 2011

I Want S'more Caramel Corn


I have been dying to make some sort of smore inspired caramel corn for several months now.  I finally had the time to develop this great recipe:

1 batch of air popped pop corn (or 2 bags of microwave popcorn)

place the popcorn in a greased 9x13 or larger pan and put it into the oven at 220 while you make the caramel

For the caramel:

1 cup butter
2 cups brown sugar
1/2 cup corn syrup
1 tbsp molasses
1 tsp cinnamon

 Mix all of the ingredients together and bring to a boil over medium heat in a very heavy pan. 

 Once the mixture comes to a rolling boil (i.e. a boil that you cannot stir down) then you remove it from the heat and mix in 1 tbsp of baking soda.  It is going to foam up.  This is the right thing.  Baking soda is going to make the caramel crisper.

 Stir the caramel sauce around until you have all of your warmed popcorn coated. 
You need to keep the caramel corn in the oven at 220 for the next hour, stirring every 15 minutes.
 While your caramel corn is cooking, you should cut up 1 bag of mini candy bars into thirds.  You could use chocolate chips, but I love the look and taste of the candy bars.  Once the caramel corn is totally cool, you can mix in 2 cups of mini marshmallows and the candy bars.  You could also add some mini graham crackers like teddy grahams, but the caramel has a flavor similar to a graham cracker. 

Tuesday, February 15, 2011

Make Your Own Easy Bake Oven Mixes Tutorial

My niece loves her easy bake oven, but she uses up the mixes like lightening.  The refills are pricey.  Usually you get 1 yellow cake and 1 chocolate cake plus 2 frosting mixes for about $6.00. 

There is a really easy way to make the cakes without costing a fortune.  It's very simple.  The mixes are basically 2 tablespoons of cake mix, any cake mix.  For birthdays and stocking stuffers, I packaged up a bunch of the mixes in plastic ramekins (available a Gordon's Food Service). Then, I slipped them into a tulle bag.  To make the tulle bags, you just use the tulle by the spool (it's like a $1 for 100 yards or something like that).  You fold it in 1/2 and make an overcast zigzag (see tutorial on this blog) to fasten the sides.  You could also straight stitch the sides and then turn the bag RIGHT sides out. 


Then I add a little custom label with the directions on it.  You can see those above.  Oil makes a cookie and milk makes a cake. 

The great thing about this is that you can either make your own cake mix (minus the wet ingredients) or you can just use your favorite premade mix (which is what I did here).  If you don't want to get ramekins, you can use sandwich bags and make a fold over label that you staple on.  I did that the first time.  All of the mixes were names after my niece - Belle's Famous Sprinkle Cookie, etc.  If they are just for your own kid to use at home, just buy a jar and keep the mix and a tablespoon in the jar and let them scoop and mix their own mix.    

Monday, February 14, 2011

Valentine's Day Tarts

I was actually inspired by a post you probably saw on our blog, Lisa's jack-o-lantern pop tarts to create this Valentine's Day version.

I started with some strawberry jam and premade pie dough. 

Then, I used a big heart shaped cookie cutter to cut out an even amount of hearts.  You may need to roll the scraps out to get another heart out of one pie crust. 
 Next, I piled a big scoop of jam into the middle of 1/2 of the hearts.
Then, I layered another heart on top and crimped the sides with a fork. 

 Finally, I put them onto a sheet of parchment on a baking sheet and baked them for 10-12 minutes at 425.

 They are sooo good.  I'm eating one with some coffee right now =).

Sunday, February 6, 2011

Valentine's Day Candy Buttons

I was looking through my new Taste of Home and I saw a sheet of candy buttons on one of the pages.  I used to love those things as a kid.  With Valentine's Day coming up, I decided to make up some sheets of my own candy buttons.

Candy dots are so great for kids.  They are fun to make and inexpensive.  You start with a batch of royal icing.  I use the meringue powder recipe for royal icing.  I would make a 1/2 batch because a full recipe will make more royal icing than you could eat in a lifetime. 

Royal Icing Using Meringue Powder:
4 cups (440 grams) confectioners' (powdered or icing) sugar
3 tablespoons (30 grams) meringue powder
1/2 teaspoon extract (vanilla, lemon, almond)
1/2 - 3/4 cup (120 - 180 ml) warm water
Note: Food Coloring (I use Gel Pastes that can be found at cake decorating and party stores or else on-line)

You can also make royal icing with egg whites. 

First, I removed 1/3 of the icing and put it into a sandwich bag.  I left it white.

Next, I tinted the remaining icing light pink and removed 1/2 of what was left and put it into a plastic sandwich bag or piping bag.

Finally, I mixed more red food coloring into the rest of the batch and made a dark pink icing.  I added that into a plastic sandwich bag. 


You can also use piping bag fitted with a small writing tip.  I used heavy duty sandwich ziplock bags.  That way you can close the bag and the kids don't get it all over the place. 

Cut the tips off of the bag.  

To make the heart shapes I traced around a cookie cutter on a piece of paper.  Then, I cut pieces of PARCHMENT paper and place 1 piece of parchment over the outline.   
 Pipe the dots on over the outline and then fill the inside of the heart in.  After you let the dots set up for a couple of minutes, you can poke down the spikes.
 If you want a more traditional look, you can cut strips of parchment and pipe rows of buttons.
 I put them on a cookie sheet and dry them out on the counter or in the oven (off) for several hours to dry.
 This is a great fine motor skills projects for kids.  My three-year-old made some candy worms. 

Another idea for working on the fine motor skills is to print out shapes, letter, or numbers and layer the parchment over the top. 

Wednesday, February 2, 2011

Ground Hog Day Cupcakes

I thought that it would be fun to make some little groundhog cupcakes in honor of Ground Hog's Day.  Plus, I am thankful that he didn't see his shadow this year.  I'm not sure if I believe spring is just around the corner and neither is my back after shoveling all of the show we got last night out of the driveway. 

So, I started with a basic chocolate cupcake. 

 Then, I laid down a base coat of chocolate frosting.  This is just store bought frosting to make life easy. 
 Then, I made the teeth.  The teeth are created by cutting a little white chocolate wafer down. 
 Then, I used 2 dark chocolate (milk chocolate will work too) wafers for the ears.  I just jammed them into the frosting. 
 Then, I stuck the tooth into the frosting.
 Next, I placed on 2 more wafers for the cheeks.
 I used a pink conversation heart for the nose.  See how I placed it upside down with the writing face down.
 Finally, I used some white frosting that I put into a ziplock bag and piped on the eyes and the whiskers.  For the centers of the eyes, you can use more of your chocolate frosting (I dabbed it on with a tooth pick) or you can use chocolate chips. 

I think that they turned our pretty cute for a super fast cupcake decorating project.  Kamille certainly enjoyed them.  This would be a very fun preschool snack.  You could use a muffin instead of the cupcake and use chocolate cream cheese instead of the sugar frosting. 

Tuesday, January 18, 2011

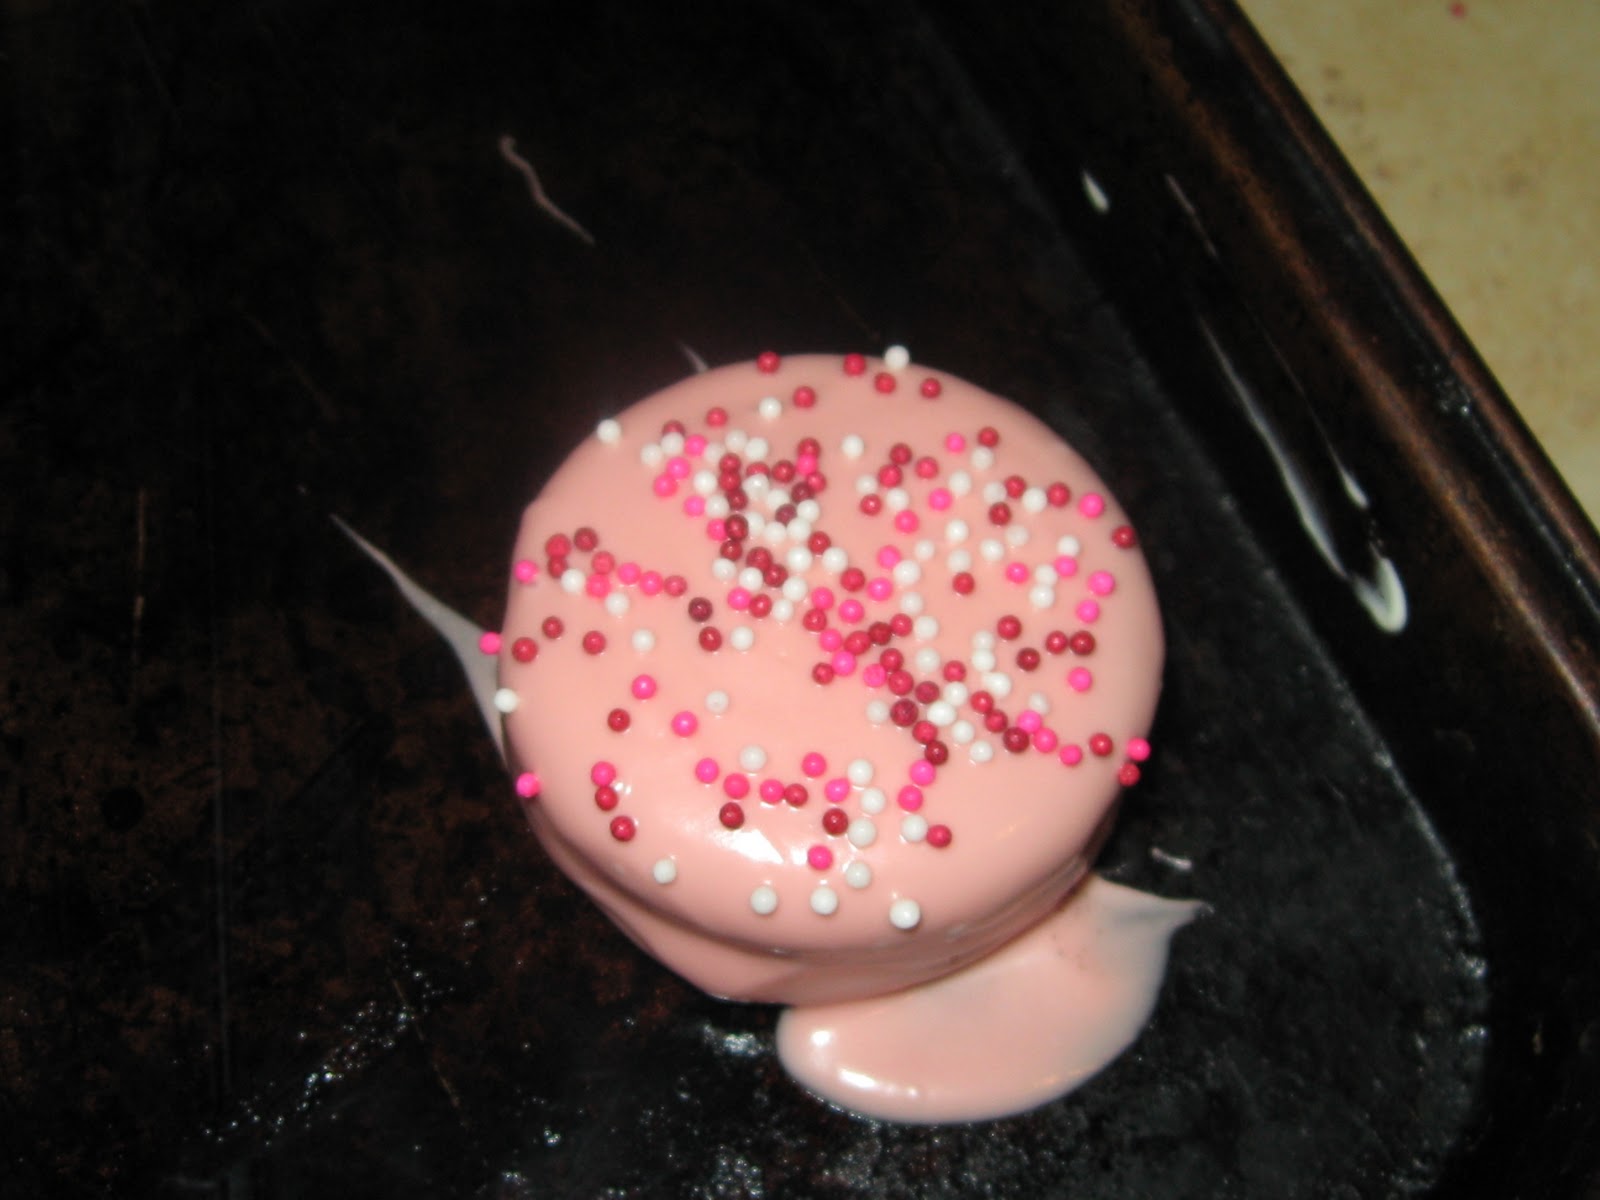
Chocolate Dipped Oreos Tutorial for Valentine's Day

I love oreo cookies so I have been waiting for a time to make these chocolate dipped oreos.  This batch is going off to my uncle.  I know he will enjoy them because I have personally caught him hiding in the pantry eating cookies behind my aunt's back. 

My this little project you need oreo or another favorite sandwich cookie of your choice, white chocolate, dark chocolate, and I also used pink candy melts, non-pariels or other sprinkles, and conversation hearts.

Follow the directions on the chocolates to melt.  You want them really warm, but be careful not to burn the chocolate.  You should use a heavy bowl, not a plastic container.  You are more likely to burn the chocolate if you melt it in plastic. 


 I use a regular fork to dip my cookies.  There is a tool for dipping that you could buy, but why waste money?  Dip the cookie so that it is totally covered top and bottom.
 Gently tap the fork on the side of the bowl to remove some of the excess chocolate and smooth out the candy.  If you wanted to make lollipops for a school party, you would stick the sucker stick into the middle of the cookie before you dip it and then use the stick to dip the cookie. 
For this batch, I used non-pariels on some of the cookies, sprinkled on immediately after dipping.  I also drizzled melted chocolate in contrasting colors and made some chocolate hearts to put on the top of some of the cookies. 
 Place each cookie on wax paper, parchment, silpat, or a lightly greased (with butter) cookie sheet.  They set up quickly, especially if you put them in the freezer (which will help them pop off if they get stuck).  Notice how I didn't care if the bottoms were not perfect.  Once the cookies are set, you can remove the extra chocolate.  It just snaps off.  If you are really concerned, you can clean them up with a knife. 

Finally, I put them in a cupcake box.  They come in a 3 pack at Michael's for about $3.99.  The little box hold 12 cookies.  I tied it with some curly ribbon.  If I was making lollipops, I would wrap each one in a plastic candy bag and tie it closed with a bow.

Thursday, January 6, 2011

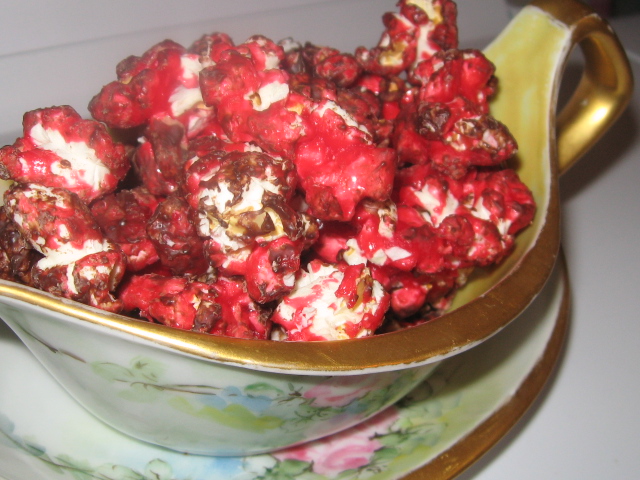
My Newest Caramel Corn


This caramel corn is inspired by one of my favorite treats- Chocolate Covered Strawberries

It is my standard caramel corn recipe:

1 batch of popcorn (either 1 bag popped or 1 load in your air popper)
Heat your oven to 220 and put the popcorn in there in a greased pan and keep it there until the sauce is ready.

Heat is a very heavy bottomed sauce pan:
1 cup sugar
1/2 cup butter
1/4 cup corn syrup
1 package strawberry jello
(you can also add some pureed fresh strawberries)

Bring this to a boil, stirring constantly.  Boil for 5 minutes.  Turn off the heat and add 1/2 tsp baking soda.  You may also want to add some extra red food coloring (based on how red your want your caramel corn).
Stir your hot caramel sauce onto the popcorn until it is coated.  Put it into the oven and stir every 15 minutes for an hour. 

Remove from the oven and mix in some mini marshmallows.  I then mix in chocolate chips until the corn is coated.  Finally, once it is all cooled, you can mix in some mini kisses, sprinkles, dried Strawberries, etc. 

Enjoy!


Tuesday, January 4, 2011

5 Fun Tutorials For Using Cupcake Liners


Aunt Peaches shares an awesome tutorial for making this Ruffled Lotus Lantern.

===========================================================


Paper Crave has this great tutorial for a cute cupcake tree. This would make a sweet addition to any Valentines decor:)

=========================================================


The Lovely Paper Blog has a nice tutorial for making these adorable flowers!

===========================================================


The Single Nester has a super easy tutorial for how to make this heart shaped wreath.


Craft Gossip shows us how to make these yummy little treats that use a cupcake liner as the base! 


Working with Cork Fabric

So, I am not an expert in this - based on using it for one project.  However, I did a lot of research before buying it and watched quite a f...