I started out by finding a tank top and a pair of underwear that fit my daughter and my niece. Then, I used those to make the patterns. It's easier than trying to measure a busy 4 and 8 year old.
For the boy shorts, I took to waist measurement from the pair of underpants. I divided it in half and then cut out 2 rectangles that were about 11"wide x 10"long. Then I cut out the crotch seam which is about 8" long and 2" deep. See how there is about an 1 1/2" below the crotch seam that will make a short little inseam for boy short bathing suit bottoms. You could also get the measurement by measuring the waist and along the hip from the place you want to waist of the shorts to sit (which is probably going to be below the natural waistline) to the place you want the short to end. You divide the waist measurement in half. You can add 1/2" onto each measurement for seam allowances. So, for example if you have a 20" waist and 9" in length, you want to make the rectangles 10 1/4" x 9 1/2".
Next, I place the two pieces RIGHT sides together and stitch up one of the crotch seams.
Then, I added elastic. You probably won't need elastic in the legs, but this was my first pair and I wanted to make sure. I just used plain old 1/4" elastic. You can use bathing suit elastic, but I didn't have any handy. Regular knit elastic worked just fine. Cut the elastic a little shorter that the waist. Then you want to zigzag the elastic down onto the wrong side of the fabric. You will stretch the elastic as you go, which creates the slight gather. Repeat for the legs. I always by my elastic in bulk online to save money. The price of elastic has really gone up in stores. I put a link above to the elastic I use.
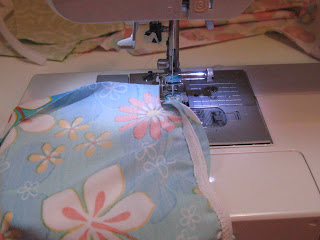
Once you have the elastic zigzagged onto the wrong side of the fabric, you want to fold the elastic over and the straight stitch it down. I did a double row of straight stitching to give it a really finished look. You could use a double needle as well. The next two photos show how the elastic will look once it is stitched down on the RIGHT side and the WRONG side. Trim away any excess fabric.
Fold the shorts RIGHT sides together and stitch up the rear crotch seam.
Once the rear crotch seam is stitched up, trim. Then you need to line up the inseam as shown and stitch the legs together.
The finished boy shorts look like this.
Check out the part 2 tutorial Saturday.


No comments:
Post a Comment